
Recently I spent more than a week photographing in a beautiful area of the Sierra Nevada backcountry. A short walk above the spot where we camped was a magical meadow — a place filled with light, grasses still green but starting to turn golden, high elevation trees scattered around the edge of the meadows, and a deep valley separating us from alpine valleys topped by steep granite peaks and ridges with scattered snow fields. At times clouds would float by and add some interest to the blue Sierra Nevada sky.
What I saw
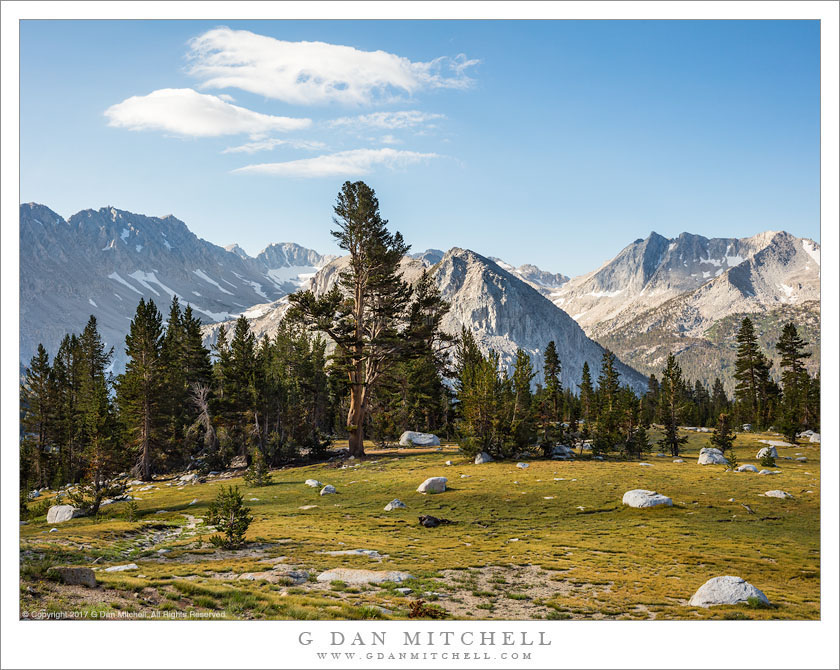
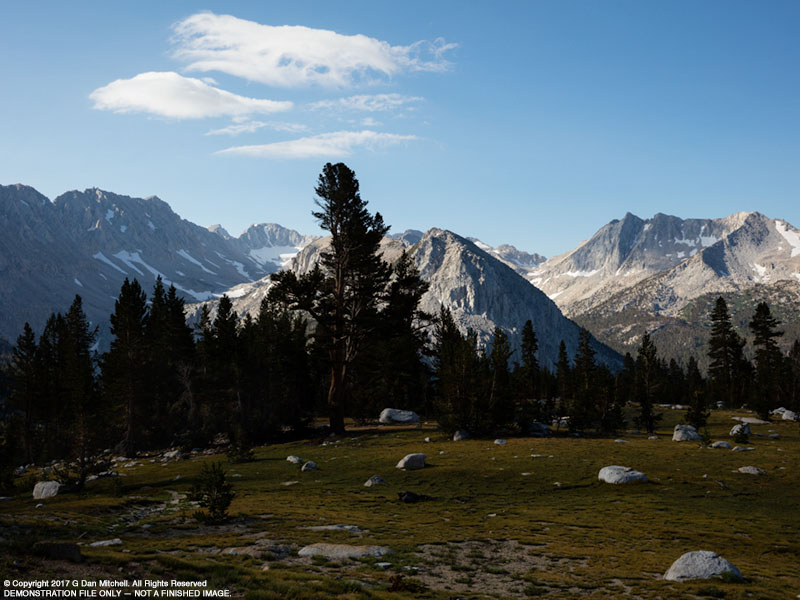
Here is one of several photographs I made in this meadow, with the first example being a small version of a print-ready final interpretation…
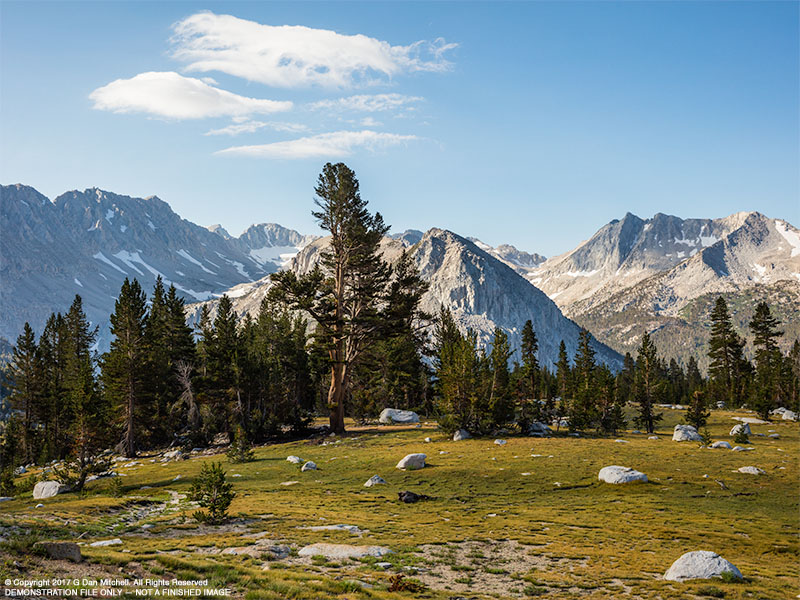
Here is another version of the photograph, straight out of my raw file conversion program and before I did additional work in Photoshop…
I think it reflects fairly well what I saw while I stood behind the tripod as light softened by closer clouds spread across the meadow. I’m confident that anyone who had been there with me would agree.
What the camera saw
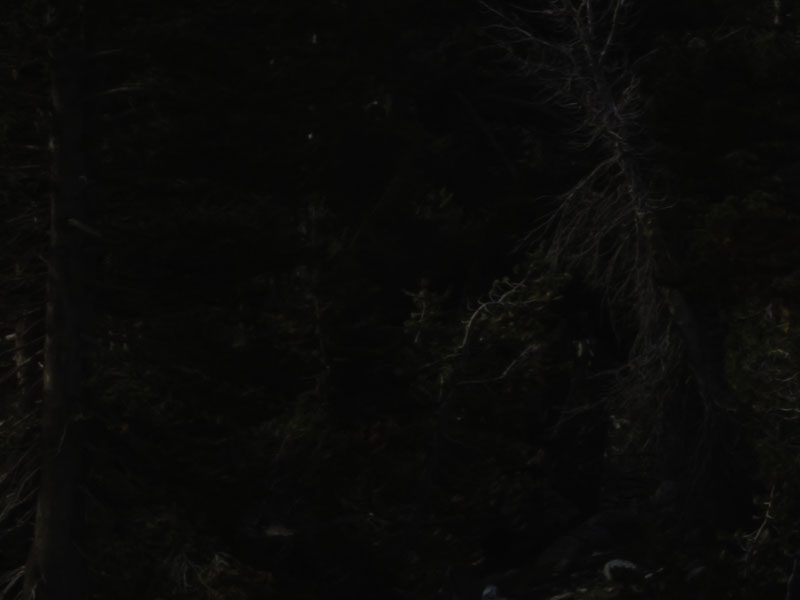
But that is not what the camera saw. Here is what my captured file looked like before I did my raw conversion post-processing…
Yuck!
This SOOC (“straight out of camera”) image looks pretty bad. The sky is OK, but the meadow is dark and flat-looking, not showing the actual quality of light at all, and the forest appears to be almost completely black.
What’s up here? Am I trying to trick you and present a false version of the scene? Am I an incompetent photographer who completely blew the exposure? Am I trying to “compensate” for a bad exposure by using radical post-processing?
The answer is “none of the above.” I am not trying to present a false version of the scene. I exposed this frame exactly as I meant to. I planned to use the image data captured in that exposure to produce an image like the upper one that is true to what I actually saw.
The problem
This scene presents a well-known problem. Its dynamic range — the spread between the darkest tones and the lightest tones — is extremely large, ranging from brilliantly white snow fields and clouds down to deep shadows among the dark backlit trees at the edge of the meadow.
An exposure that made the forest as light as it actually looked would “blow out” the bright areas, probably including the sky, to pure white, losing all detail. An exposure that accurately captured the bright white snow and clouds leaves the forest almost entirely black, with little visible detail.
Something has to give. In almost all cases it turns out to be better to avoid blowing out the highlights. Once they are overexposed they are lost and can generally not be recovered in post-processing. (All luminosity values in the bright areas are captured as pure white, without any of the subtle near-white tones.)
But controlling the highlights means that the shadows will need to be recovered during the post-processing phase — generally speaking by making them lighter using various adjustments.
A few years ago this was not always feasible. While the photographer could boost the luminosity levels of the near black tones, cameras did not handle noise well at those luminosities. If one pushed the shadows too far — and “too far” wasn’t all that far — they could end up being light enough, but with very visible noise, some of which might be the dreaded chroma (or color) noise. Noise reduction could help, but only to a degree.
Several solutions were available. One could use graduated neutral density (“GND”) filters to darker the bright areas without affecting the dark areas. Many photographers, including me, sometimes used exposure blending — making one exposure for the dark area and a second for the bright area and then combining the best parts of each in post. Some HDR (“high dynamic range”) software could be helpful in some cases.
The solution
But today’s digital cameras, from virtually all manufacturers, do a much better job of recording image data in high dynamic range scenes. This allows the photographer to choose an exposure that captures the largest amount of good image data, even if it doesn’t immediately look great in the camera. (Film photographers used to do this sort of thing all the time, for example by processing their film differently when the dynamic range was large, and by choosing exposures using methods such as the zone system.)
The bottom line is that today’s digital files actually contain a lot of good, recoverable image data in dark areas that would have been lost in the past. I anticipate this when I make an exposure in the field — I’m less concerned with what it looks like on the rear display, and way more concerned with what the histogram tells me. Those dark areas can be quite dark, but if they aren’t too dark I know that I can bring them back in post, and I will have protected those highlights.
To demonstrate just how radical the adjustments can be and still produce a fine image, here are the Adobe Camera RAW (“ACR”) post processing settings for the better version of this photograph as seen above.

Those settings would have been regarded as radical to the point of being unwise a few years ago. The luminosity of black tones has been pushed to +20, but shadows have been increased all the way to the maximum setting of +100. Overall exposure is also up by +.4, and highlights have been reduced to compensate and retain details in clouds and snow. (I apply some additional adjustments via the gradient tool, as well, that are not shown here.)
And the purpose of those changes? To make the file look like “what I saw,” both by getting some light into what the “camera saw” as very dark tones and by ensuring that those highlights were not blown out.
I still often make “safety exposures” at darker and lighter settings when I have a chance, giving me files that I could combine using exposure blending. But the fact of the matter is that I virtually never have to rely on blending any more — it virtually all cases now I can recover all of the detail I want, and without excessive noise or other problems, simply by applying raw conversion and other post-processing settings.
If you haven’t tried this, consider thinking differently about exposure. Rather than working to get a capture that “looks like the scene” in the camera, in these challenging, high dynamic range situations instead focus on capturing the maximum scene data, even in the image doesn’t look great in-camera. Make a note of the scene in your memory, and then in post make whatever changes are necessary to produce a screen image or print that is true to what you saw.
A closer look
One more thing. An experienced photographer and post processor focused on technical issues might ask: “That looks fine as a little on-screen jpg, but how is it going to look as a print at full size?”
Glad you asked. ;-)
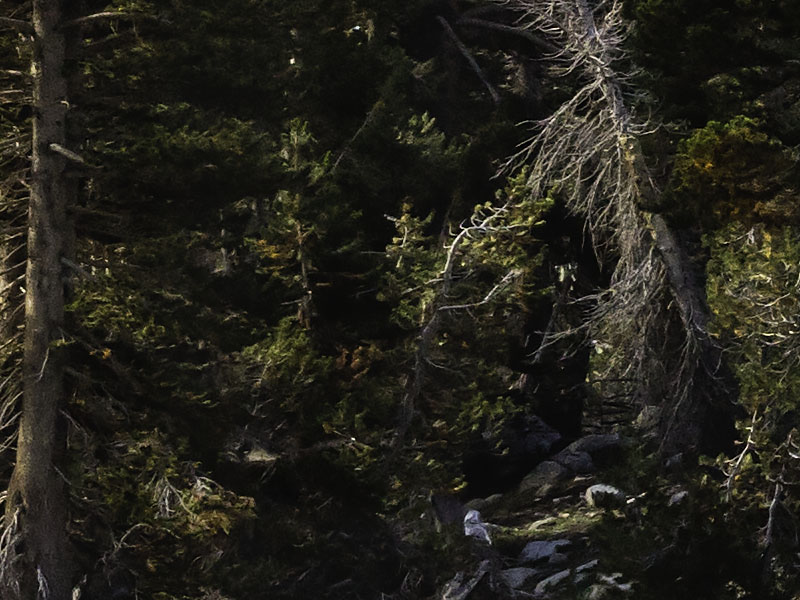
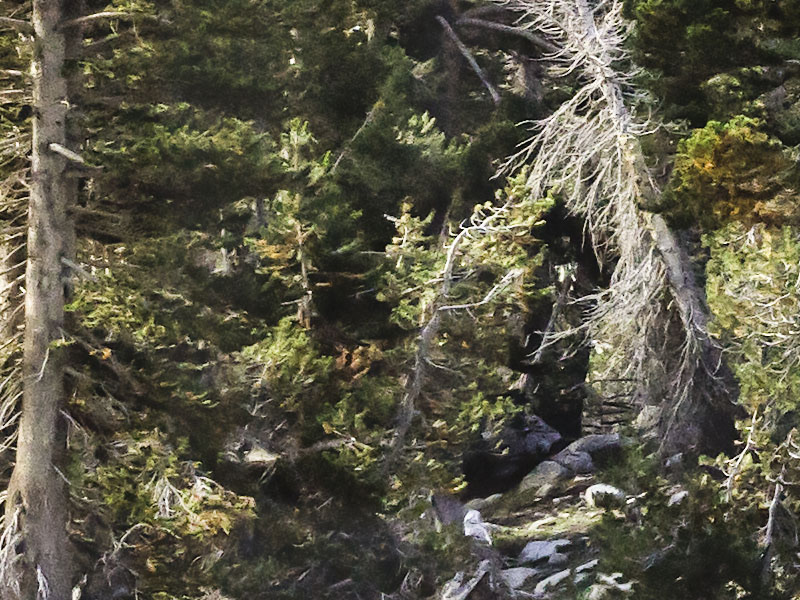
Here are some interesting examples. They are 100% magnification crops from the original file that have not been resized. (A 100% magnification crop displays each pixel of the original as a pixel on the screen — e.g. no reduction or enlargement. “Crop” refers to the fact that we are looking at only a small section of the image.) Each includes a section of the image where the forest trees were virtually black in the original exposure.
(Note: Due to the formatting of this website, images may be shown slightly reduced on this page. You may click on each image to see it at full size, which should be approximately 800 x 600 pixels.)
The first is a 100% magnification crop of a section with the extremely dark trees that I mentioned above, here shown as it was in the original capture and with no post-processing…
I think we can agree that this is way too dark!
(Note that the first example, for technical reasons, only aligns approximately with the crops shown below.)
The next example is a 100% magnification crop with the post-processing that I used in my example in this article— and that I used for the print-ready version of the photograph shown at the top of this page…
Note that is is roughly equivalent to looking at a 6′ x 8′ (that’s feet, not inches) print at nose-length distances. I’m not seeing any problems here — detail is quite good and there is no visible noise.
OK, but let’s say you are a real critic: “Yes, but how much noise is actually there that we can’t see because it is dark?”
For the moment, I’ll forgo the most logical response (that it doesn’t matter!) and instead share a modified version of the crop in which the post-processing exposure setting has been raised another +2.00 — a total of about +2.40 plus the +100 shadows and +20 blacks adjustment already shared. Now that should show some noise, right? (If I did this to the whole print it would look abominable and the sky would be white…)
Hmmm. Considering that this is a small section of what would be equivalent to a 6 foot wide print… I’m saying that this stillI looks remarkably good.
Modern digital cameras[1] really do change how we work, and often in rather remarkable ways.
Questions or comments? You can leave them below on this page and I will reply as appropriate.
NOTES:
[1] I used the 51MP Canon 5DsR to make these photographs.
 G Dan Mitchell is a California photographer and visual opportunist. His book, “California’s Fall Color: A Photographer’s Guide to Autumn in the Sierra” is available from Heyday Books and Amazon.
Blog | About | Flickr | Twitter | Facebook | Google+ | LinkedIn | Email
All media © Copyright G Dan Mitchell and others as indicated. Any use requires advance permission from G Dan Mitchell.
Discover more from G Dan Mitchell Photography
Subscribe to get the latest posts sent to your email.