Category Archives: Technique

Wildflower Photographs: A Quick Exposure Tip

Since wildflower season is upon us, I have a quick tip that you might find useful if you photograph intensely colorful flowers such as California golden poppies or similar seasonal wildflowers. (The tip is also useful for photographing fall foliage.)

Let’s imagine a photograph of California golden poppies in which the flowers fill the frame – either because you photograph a large dense field of poppies or because you shoot a smaller group from a close distance. You use the automatic exposure setting on your camera and make a photograph… and you notice that the color is ridiculously intense and that in the areas of most intense color almost all detail has been lost. It dawns on you – correctly, in all likelihood – that you probably over-exposed and blew out the bright highlights of the flowers.

But you are a smart photographer. You know that your camera has a histogram display that will show the brightness across the dynamic range that your camera can record. (It will probably record a somewhat larger range if you shoot in raw mode, but being a “smart photographer” you are doing that anyway. :-) You compose your shot and this time decide to work in manual mode rather than relying on automatic exposure settings. If you have live view you might look at the histogram as you focus. If you don’t, you make the shot and check the histogram right afterwards. In both cases, the histogram display looks pretty good – the curve doesn’t flatten out against the right side of the display but it is close because you “exposed to the right,” and the left end of the curve doesn’t hit or go to far into the “dark” end of the display. But when you check out your photographs later on, it seems like the brightest areas of the flowers are still too bright – they seem blown out and some detail is gone.

What is going on? In all likelihood, the image is much stronger in the red channel than in the green or blue channels since the color of these flowers is very strong in that channel. But your automatic exposure system has to make a best guess based more or less on an average of the three channels, and it “overlooks” the unbalanced light that is weak in the blue and green channels but too strong in the red channel. The normal histogram does the same thing. It shows an overall luminosity level that reflects the sum or average of the three individual color channels. For fairly normal subjects this works pretty well in most cases, but with subjects that are intensely bright in one channel all bets are off.

Many current DSLRs provide a solution. They will let you switch the histogram display on your camera to show the average histogram and/or three additional curves for the three separate color channels. (I often work in “live view” mode on my Canon 5D2, where I can choose between seeing the single white average luminosity or the three separate color channels – I leave the display on the latter option by default.) By working with this display you can now see the luminosity levels of the individual channels and spot the hot channel and adjust your exposure accordingly.

What if you have an older DSLR or a camera without this histogram display option? The basic idea remains the same, though you’ll perhaps have to “wing it” a bit. If you do shoot in an automatic exposure mode, you may want to dial in 2/3 of a stop or so of exposure compensation to darken the image a bit. If you can’t get it perfect, in general it may be better to dial in the full stop and be more sure that you’ll avoid the blown red channel.

A few final points: First, depending upon what else is in the frame, you may have to do some post-processing to get things to look the way your remember – it may involve some work with curves adjustments, perhaps some color adjustments, and possibly a bit of desaturation. Secondly, you can encounter a similar issue with some types of extremely colorful autumn foliage, especially when it is very “hot” in the orange or red tones, and the same technique can be useful here, too. Third, foliage is not the only cause of this issue – you can also encounter it which intensely colored light from other sources. For example, a common problem is seen in photographs of sunsets on mountain peaks where the intense sunset color blows out the red channel in areas that include the direct sunset light – and, again, “under exposing” a bit can compensate. Fourth, the problem is not limited to the “natural” world either – you can also encounter it when shooting scenes with very colorful artificial light.

G Dan Mitchell Photography | Flickr | Twitter | FacebookLinkedIn | Email
Text, photographs, and other media are © Copyright G Dan Mitchell (or others when indicated) and are not in the public domain and may not be used on websites, blogs, or in other media without advance permission from G Dan Mitchell.

Night Photography With ‘The Nocturnes’

Moonlit Stairway, Wall, and Window

Moonlit Stairway, Wall, and Window. Mare Island Naval Shipyard, California. February 27, 2010. © Copyright G Dan Mitchell – all rights reserved.

Once or twice each year I have the opportunity to do night photography with The Nocturnes, the San Francisco Bay Area night photography group mostly organized by Tim Baskerville and Susan Nichols. I like to join up with them for their expeditions to the historic Mare Island Ship Yard in Vallejo, and I’ll be joining them again later this week to shoot there. (Mare Island is where this photograph and quite a bit of my other night photography work has been done.) I’m afraid that this week’s event is currently fully booked, but Bay Area photographers looking for an introduction to night photography have a tremendous local resource in The Nocturnes, through their web sites, their promotion of outstanding night photography work, and through the workshops and classes they offer.

While I’m on the subject of night photography, I’d like to share a post I wrote some time back on the subject: Hints for Night Photography. While there is ultimately a lot to learn and understand if you will do night photography, and there are a wide range of techniques that you might employ for different subjects and ways of shooting, there are some basics that can get you a long ways towards creating interesting night photographs. This post is intended to be a brief list of some of those basics.

G Dan Mitchell Photography | Flickr | Twitter | Facebook | Email
Text, photographs, and other media are © Copyright G Dan Mitchell (or others when indicated) and are not in the public domain and may not be used on websites, blogs, or in other media without advance permission from G Dan Mitchell.

Review: “Light & Land” by Michael Frye

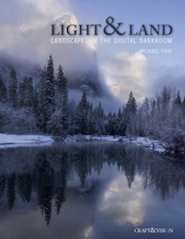
Over the past few weeks I have had the chance to go through Michael Frye’s new ebook, “Light and Land: Landscapes in the Digital Darkroom.” Many are no doubt already aware of Michael’s reputation from his photography, his workshops, and his other publications including his “Photographer’s Guide to Yosemite” and “Digital Landscape Photography: In The Footsteps of Ansel Adams and the Masters.” I have the .pdf version of “Light and Land”, and I understand that an iPad app version may also be available.

Light and Land - Michael Frye

It is typical for photographic “how to” books to focus on specific techniques, and to be organized around a presentation of these techniques – perhaps with a section on curves, a section on black and white conversion, and so forth. This approach has its place, especially for certain types of learners and at certain points in the learning process. It is important to understand the basic techniques and operations that are available in the “digital darkroom” of such programs as Photoshop, Lightroom and so forth. That said, the bigger and more important issue is how to call upon these techniques creatively and effectively and appropriately in order to make photographs. Not all “how to” books do an effective job of illustrating this.

Michael’s “Light & Land” takes a different approach, and one that more accurately and realistically reflects the thought process of a photographer who is calling upon this arsenal of techniques in the service of creating beautiful photographs.  He writes:

“The digital darkroom gives us tremendous control over our images. We can make them lighter, darker, add contrast, change the color balance, increase saturation, turn a color photograph into black and white, remove telephone poles, blend exposures with HDR, combine ten images to capture infinite depth of field, or put a winged elephant in the sky.

But what do we do with these choices?” Continue reading Review: “Light & Land” by Michael Frye

Yet Another Reason to Like Live View – Shooting in the Wind

I have posted in the past about some of the advantages of having a live view feature on your camera, especially for the types of photography that I do using my Canon 5DII. This past week I discovered another use, and an unexpected one at that – shooting in conditions of gusty winds.

I most often work from the tripod, and I usually use a pretty large and stable tripod in the context of shooting a full frame DSLR camera. But in some very windy conditions putting the camera on a tripod is not sufficient to stop camera motion and the consequent blur. This is especially a problem when you are shooting in low light or otherwise need to use very long exposure times, and it becomes worse when using long lenses which will catch more wind and magnify vibrations. There are a bunch of tricks that you can try in order to keep the camera steady, but in really strong winds the camera is just going to move, especially if you have a very large lens attached.

One way I try to deal with this is to time my exposures for moments when the wind may momentarily decrease. This can require a lot of patience – sometimes I’ve had to wait several minutes for a very brief halt to the gale, during which I try to make my exposure. But even in this case, you have to make sure that the camera vibration stops completely if you are using a long lens. Ultimately, you have to simply trust that the camera really has stabilized since there is no way to tell directly. Last week, as I was using live view to focus a 400mm lens on a distant subject and again noting that 400mm plus 10x software zoom in live view makes the camera very sensitive to vibration. In the past I have noted this mainly in the context of how darn hard it is to manually focus a big lens this way! But this time it occurred to me that I could use this in my favor.

With the 10x live view magnification enabled, the display is very sensitive to camera motion from the wind. I realized that by leaving the camera in the 10x magnification setup after composing the shot that I could simply watch this display, with its magnification of motion, and wait until the image stabilized during lulls in the wind to take my shots. If the display isn’t bouncing at 10x, motion blur is not going to be an issue. Problem solved. More or less.

G Dan Mitchell Photography
FlickrTwitter (follow me) | Facebook (“Like” my page) | LinkedInEmail

Text, photographs, and other media are © Copyright G Dan Mitchell (or others when indicated) and are not in the public domain and may not be used on websites, blogs, or in other media without advance permission from G Dan Mitchell.