Tag Archives: raw

What You Get Is Not What You See

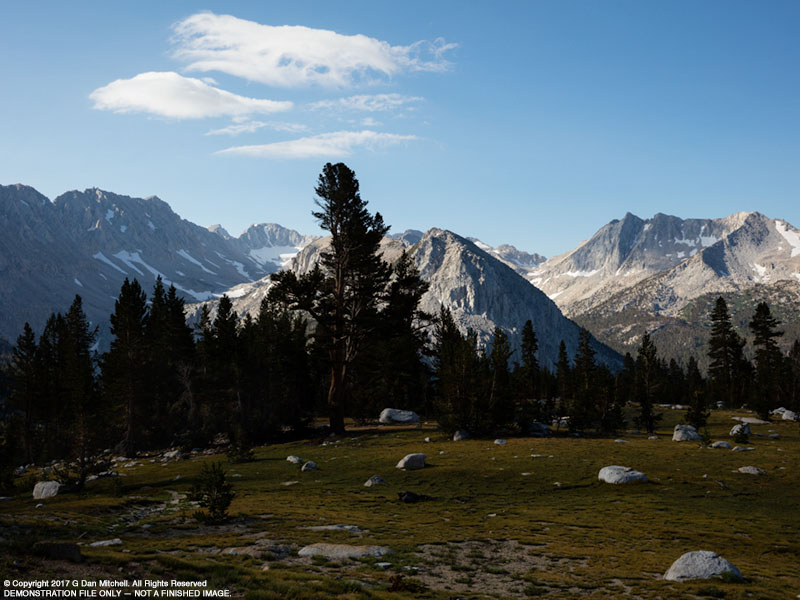
Recently I spent more than a week photographing in a beautiful area of the Sierra Nevada backcountry. A short walk above the spot where we camped was a magical meadow — a place filled with light, grasses still green but starting to turn golden, high elevation trees scattered around the edge of the meadows, and a deep valley separating us from alpine valleys topped by steep granite peaks and ridges with scattered snow fields. At times clouds would float by and add some interest to the blue Sierra Nevada sky.

What I saw

Here is one of several photographs I made in this meadow, with the first example being a small version of a print-ready final interpretation…
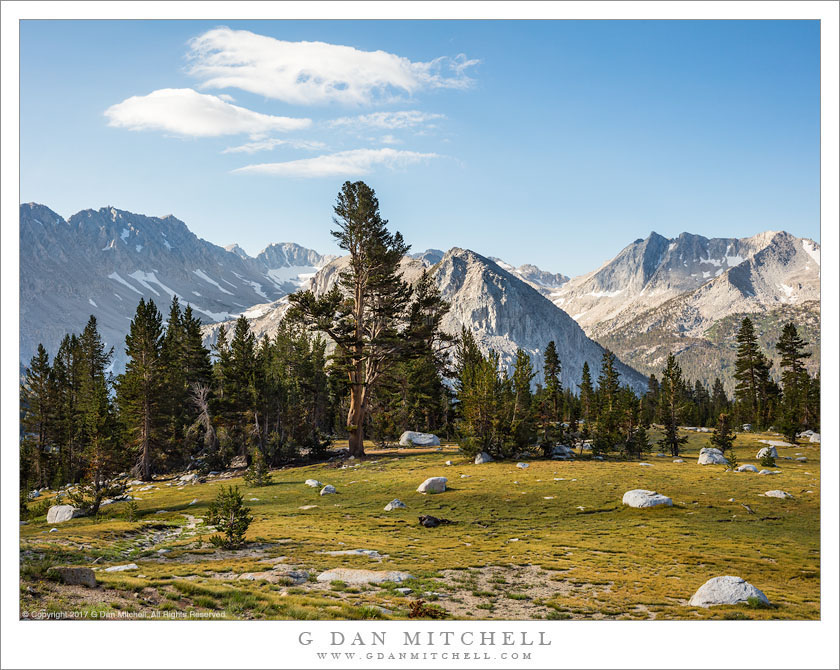
Subalpine Meadow, Forest, and Peaks
At the edge of a subalpine meadow, surrounded by forest and high peaks

Here is another version of the photograph, straight out of my raw file conversion program and before I did additional work in Photoshop…
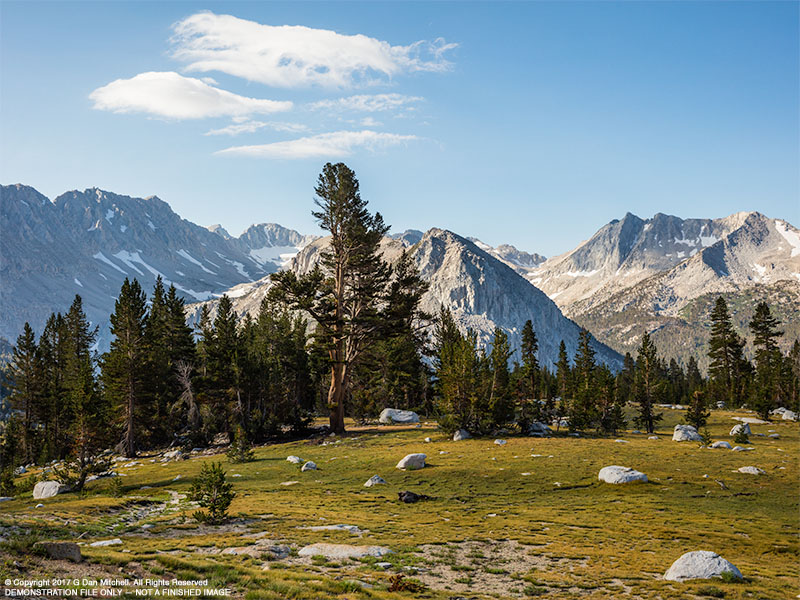
File after raw conversion operations

I think it reflects fairly well what I saw while I stood behind the tripod as light softened by closer clouds spread across the meadow. I’m confident that anyone who had been there with me would agree.

What the camera saw

But that is not what the camera saw. Here is what my captured file looked like before I did my raw conversion post-processing…
RAW file as exposed before conversion processing

Yuck!

This SOOC (“straight out of camera”) image looks pretty bad. The sky is OK, but the meadow is dark and flat-looking, not showing the actual quality of light at all, and the forest appears to be almost completely black.

What’s up here? Am I trying to trick you and present a false version of the scene? Am I an incompetent photographer who completely blew the exposure? Am I trying to “compensate” for a bad exposure by using radical post-processing?

The answer is “none of the above.” Continue reading What You Get Is Not What You See

Sharpening Basics: A Primer

(Minor updates to this article were made in February 2019.)

Sharpening is a very important step for optimizing digital photograph files. If you let your camera save images in the common .jpg format (a compressed image format that is often used on the web) the camera is applying sharpening to the image produced by the camera sensor. If you use the raw format (a high quality format that retains the original sensor data of the exposure) you will find that the photograph looks soft until you apply sharpening during the post production phase.

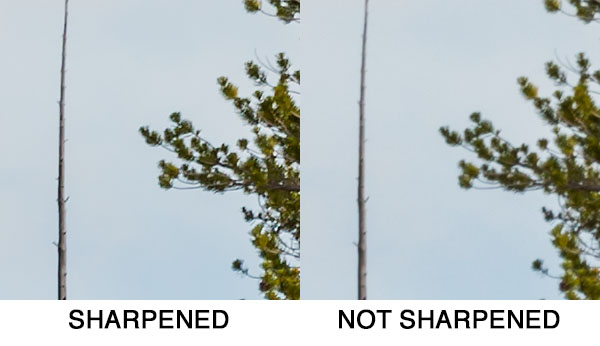
Sharpening optimizes the visibility of details that are already in your photograph. It is a matter of more clearly revealing what is in the photograph than  a matter of creating detail where there was none. Most sharpening works by increasing the contrast between light and dark areas in the image — what we call sharpening as actually more about adjusting the relative brightness of adjacent portions of the photograph.

Typical sharpening

The image above is an example of a small section of a photograph.[1] It is a “100% magnification crop” of a tiny area from a much larger photograph made with a high megapixel DSLR camera. A “100% magnification crop” is an image displayed so that each pixel — or individual picture element — of the original photograph is displayed using a single pixel on the screen. (Things are a bit more complicated than that when using modern high-resolution monitors, though I’ll let that description stand for now.) 100% magnification crops let us look very closely at what is going on in photographas “at the pixel level.” In this case, the full original image from which these small examples were extracted would be equivalent to prints at a width of roughly 10-12 feet.

The right side of the example shows this tiny section of the photograph before sharpening. The left side shows the results of fairly typical sharpening. Continue reading Sharpening Basics: A Primer

Post-Processing: A Shadow Recovery Example

(In another forum someone asked a question – actually, more like posed a challenge – related to how much usable detail and quality could be extracted from a raw file that contained areas of very low luminosity, as could happen with a badly underexposed image or with an image of a scene with a very large dynamic range. Since I went to the work of responding and illustrating my response, I figured that I might as well share it here, too. With minor revisions, here it is.)

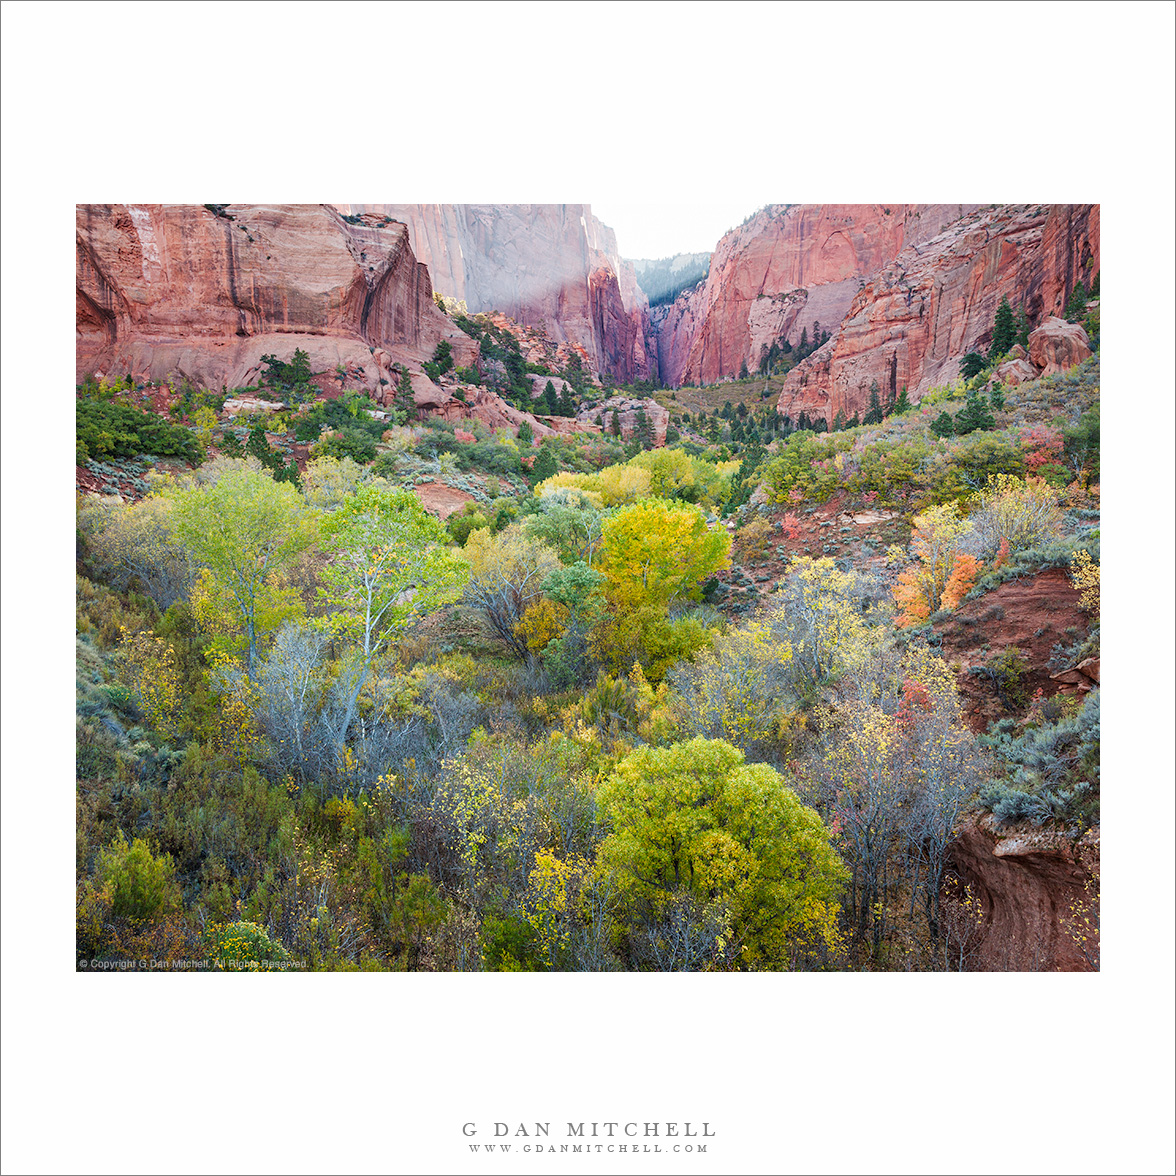
First, I actually have a “real” version of this photograph in which highlights were slightly blown, but which I preferred to use since I could bring them back in post and get a bit more shadow detail to start with. (It looks a bit bright to me as an on-screen jpg, but it makes a fine print.) That photograph ended up looking like this:

Kolob Canyon, Morning - Morning light slants over the top of sandstone cliffs above early autumn foliage in Kolob Canyon, Zion National Park
Morning light slants over the top of sandstone cliffs above early autumn foliage in Kolob Canyon, Zion National Park

This photograph and the other I’ll move to below were both shot from a tripod with a Canon EOS 5D Mark II at ISO 100 using the Canon EF 24-105mm f/4L IS at f/16. While the “keeper” used for the photograph above had a 1/4 second exposure, the example I’ll use below was shot at 1/30 second.

The exposure challenge in this scene was the very large dynamic range between the bright spot of sky at the head of the canyon and the much darker colorful foliage in relatively deep shadow in the foreground. Exposing for optimal quality in the foreground would completely blow out the sky, while exposing for the sky would necessarily grossly underexpose the foreground.

I originally thought that I might like to have four bracketed exposures in case that would let me produce a better final image via layer blending, but it turned out to be unnecessary and the final image (as shown above) has a single source file with no blending. However, this means that I still happen to have one very badly underexposed (by three stops) version at 1/30 second which I’ll use here as the starting point for what I plan to illustrate in this post. Follow along with me and see what I can do with the very underexposed version of the file… Continue reading Post-Processing: A Shadow Recovery Example

RAW File Review – Rediscovering the Past

After returning from New York City last week, I took on the daunting task of reviewing about eight years worth of raw files. (Anyone who has tried probably just exclaimed, “yikes!,” or something much less polite… :-)

I’m _very_ conservative when it comes to deleting raw files, figuring that it is better to end up keeping files I don’t need than to find out that I trashed something that could have been useful. In addition, as I do an annual review of the previous year’s raw files every winter, I invariably discover a few good photographs that I had somehow passed over or failed to notice at the time I made them.

As non-fun as the process of reviewing tens of thousands of files can be, there are some worthwhile results, including:

  1. I do delete a fair number of just plain useless files that have been cluttering up my hard drive. I figure that if it wasn’t interesting a the time I took it, wasn’t interesting during my annual raw file review, and still isn’t interesting a few years later… it may be time to get rid of it.
  2. I find some (to me, anyway) real treasures that I had overlooked to misunderstood or simply forgotten at the time. At some point I’ll write more about why this happens, but it is not unusual to fail to understand how a photograph works right after making it. But when viewed with some temporal distance, some photographs turn out to surprise me by how successful they might be. So one of the pleasures of this otherwise daunting task is the discovery of such images.
  3. I relive experiences related to the making the photographs. When I view my own photographs, the visual imagery is always associated with non-visual experiences that were part of the process of making the photo. When I “rediscover” some of these older image – even some that turn out not to be photographically worthy of sharing – I also rediscover those experiences that I had forgotten and all sorts of memories return. (Among those in this batch are many of my family – especially fun during the week when our youngest son moved off to a different city of get his first job.)
  4. I learn things about my own photographic growth that might not be apparent when only considering the most current work. For example, I’m often struck by how certain themes and ways of seeing that I’ve come to recognize more recently were already present in work done quite a while ago. Understanding this is important, I think, to developing self-awareness as a photographer.