Tag Archives: sharpness

Photographic Myths And Platitudes — Diffraction Limited Aperture

It has been a while since I posted an article in my “Photographic Myths And Platitudes” series — so here is a new one! It is a bit different than some of the previous posts in that it is based on something I wrote elsewhere in response to a lengthy (and long-winded!) discussion that suggested hyper-awareness of the so-called diffraction-limited aperture

What is the diffraction-limited aperture, you ask? It is a real thing — not a myth — though it is sometimes over-emphasized by overzealous techno-photographers.  In simple terms, as you stop down a lens its potential maximum resolution declines as a result of diffraction blur. (Keep in mind that other factors affect sharpness, too. Also, this happens to every lens, from the cheapest to the most expensive — it is a universal optical phenomenon.) At some aperture, the increase in blur becomes significant enough, in a technical sense, to be more of a “limitation” on image sharpness than the ability of the sensor to record detail — e.g. the “number of megapixels” of the sensor. A simplistic interpretation of the concept suggests that a photographer should avoid other apertures in order to “get the sharpest image.”

As with many things in photography, it isn’t that clear-cut.

Now on to my original post. It is a bit technical, though I think most photographers should be able to follow it — and I will conclude with some simple, straightforward practical advice. (And here I remind readers that sharpness is not the most important, much less the only important thing in photography. Far from it!)


Sharpness, or at least the perception of sharpness, is a more complex thing than choosing the aperture the provides (to the extent that this can be determined) the highest optical resolution at the sensor plane, measured at either a) the best performing point in the frame, or b) the average across the frame.

(Speaking of “the extent that this can be determined,” I wonder how folks would answer the following question: Which is “sharper,” the image with the best center resolution but slightly lower corner resolution or the image with slightly less center resolution but better overall resolution across the frame?)

While we might consider whether f/16 will be softer than f/8 on some lens/camera combination — it almost certainly will be softer — it isn’t irrelevant to ask: “How much softer, and will this affect my print?” In quite a few cases the difference in maximum resolution in the print will be essentially invisible. In other words, while you will get optimal resolution at some particular aperture, you will actually still get extremely good print resolution at a smaller (or larger) aperture, too.

If there is no particular photographic reason to choose a smaller (or larger!) aperture, you might as well use whatever aperture you think will produce the highest resolution. That best resolution aperture will vary based on the lens you are using, the camera format, and arguably the photo site density of the sensor. To generalize, if you are shooting full frame it will probably be somewhere in the f/5.6-f/8 range with many lenses. (Other things can affect that — for example, what the maximum aperture of the lens is.) On a cropped sensor camera you could, in many cases, use either the same aperture or guess at one stop larger or so — while realizing that there could be resolution downsides to going larger with some lenses. Trade-offs abound! (I’ll spare you the technical discussion of all of the variables. You can think me later.)

But, seriously, if you are calculating the “sharpest” aperture to the closest 1/3-stop for each lens and using that aperture in the field and avoiding others that are slightly different, you probably aren’t really gaining anything significant from your efforts, and you may be sacrificing things that could make your photographs better.

That said, if we know that some mid-range aperture can provide the highest resolution, why use other apertures? And if we do use other apertures, won’t we end up with a softer print? Continue reading Photographic Myths And Platitudes — Diffraction Limited Aperture

A Small Test: Fujifilm X-Pro2 Mirrorless and Active Subjects

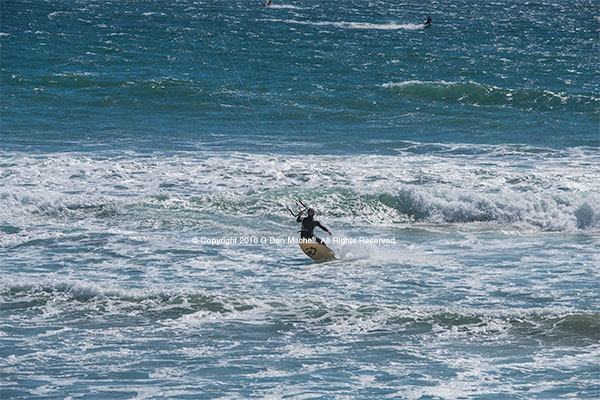
I want to share the results of a little informal test I did today using my Fujifilm X-Pro2 (B&H | Adorama) mirrorless interchangeable lens camera and a Fujifilm zoom lens to photograph an active subject. First, here is an unremarkable photograph, aside from the fact that I would probably not have used my previous mirrorless camera to photograph this subject.

Fujifilm X-Pro2, ISO 400, f/8, 50-140mm lens at 140mm, handheld

Read on to find out why I photographed this and what I learned from it.

Background

I first used a mirrorless digital camera way back before the 21st century began — before there were DSLRs there were a number of early digital cameras, and my first was an Apple QuickTake! I used several others from a range of manufacturers before I acquired my first DSLR in about 2003.

As a group, mirrorless cameras have had some problems. One of the most glaring has long been slow autofocus (AF) speeds. Those very early cameras were often just plain awful in this regard, but they got better over the years.

Until recently I used a Fujifilm X-E1 mirrorless interchangeable lens camera, and it was my primary camera for travel and street photography for about 3 1/2 years. Its AF was fine for most things, but I also had to learn to adapt to slow AF in low light and with low contrast subjects — and the issue was more acute with some lenses than with others. For this reason — and a few others, including electronic viewfinder (EVF) display latency — I would never have thought to use that camera for photograph active subjects. Continue reading A Small Test: Fujifilm X-Pro2 Mirrorless and Active Subjects

The Canon EOS 5Ds R — Resolution Examples

… and the EF 100-400mm f/4.5-5.6L IS II lens.

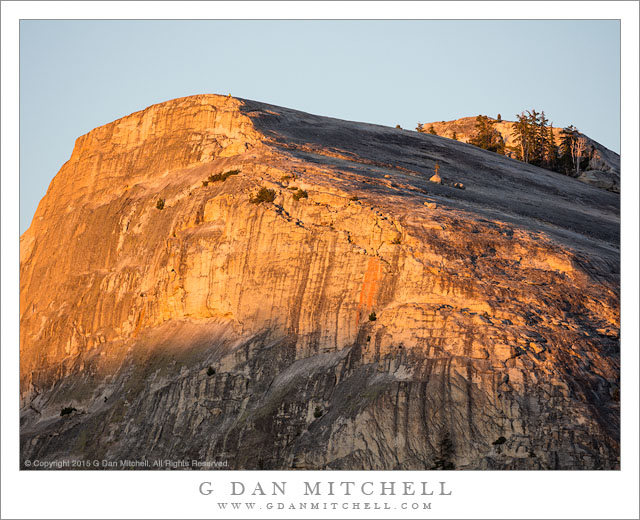
A few days ago I spent four days in the high Sierra making photographs. At the end of one evening I made a photograph that isn’t intended to have any particular aesthetic value, but which was intended as a test of something about my new camera, a Canon EOS 5Ds R.* So I pointed it up at the top of this nearby granite dome just as the last light washed over its summit.

The technical information about the photograph:

First, the resulting photograph — which is, I will be the first to admit, not a stunning example of photographic art!

Lembert Dome Sunset Watcher
A lone person watches the Sierra sunset from the summit of Lembert Dome

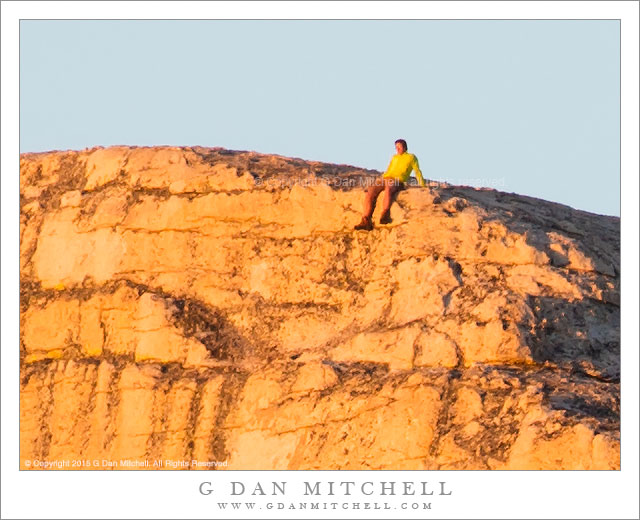
Next a crop from the same photograph showing a little surprise at the edge of the precipice. This is the same photograph, but this time a 100% magnification crop of a 600 x 450 pixel section. (You’ll have to click on the photos to see the 600 x 450 versions, since the design of this website slightly downsizes photos posted at that size.)

Lembert Dome Sunset Watcher (crop)
A lone person watches the Sierra sunset from the summit of Lembert Dome

If you are wondering where this guy is in the full image, he is just below the right summit of the peak, slightly to the left of the start of the large shadow.

I’ll share some other examples later that are better optimized to show the resolution potential of this camera — photographs using something closer to the diffraction-limited aperture, focal lengths not at the extreme long end, with a lens that has even better resolution potential, and with a subject that is not so far away. (The distance introduces atmospheric elements that reduce resolution.)

Not bad, I’d say.

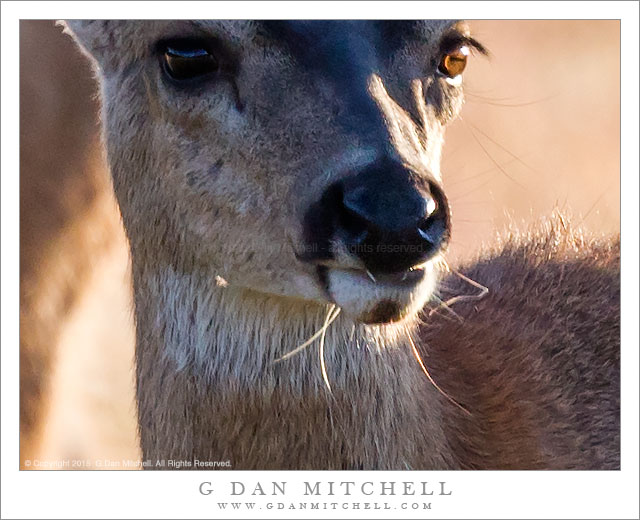
Added later:  Someone asked how the 5Ds R handles the fine details of feathers. I’m sorry to say that I have not photographed birds yet — that is more of winter thing for me. However, while making landscape photographs this past week, deer wandered into several of my scenes and I went ahead and photographed them. The following 100% magnification crop (actual pixel size) was also made using the EOS 100-400 f/4.5-5.6L IS II at 400mm, f/5.6, IS and AF on, ISO 100. The critter was in shadow, and exposure has been pushed here roughly a full stop. (Click the image to see the original 600 x 450 pixel image — the version on this page is slightly downsized.)

Deer — 100% magnification crop at 600 x 450
5Ds R, EOS 100-400mm f/4.5-f.5L IS II @ 400mm, f/5.6, 1/200, ISO 100, AF and IS in us

And one more example, also a 100% magnification crop: Canon EOS 5Ds R, ISO 100, 1/13 second, f/8, EF 100-400mm f/4.5-5.6L IS II @ 105mm

100% Magnification Crop — 5Ds R & 100-400 v2 lens
Canon EOS 5Ds R, ISO 100, 1/13 second, f/8, EF 100-400mm f/4.5-f5.6L IS II lens @ 105mm

5Ds and 5Ds R Articles:

  • Links to the Canon EOS 5Ds and the Canon EOS 5Ds R in this article go to site-sponsor B&H photography with whom I have an affiliate relationship. When you purchase through these links your price is the same, but a small percentage is returned to help support this website.

Mentioned in this article:

© Copyright 2015 G Dan Mitchell – all rights reserved.


G Dan Mitchell is a California photographer and visual opportunist. His book, “California’s Fall Color: A Photographer’s Guide to Autumn in the Sierra” is available from Heyday Books and Amazon.
Blog | About | Flickr | Twitter | FacebookGoogle+ | 500px.com | LinkedIn | Email


All media © Copyright G Dan Mitchell and others as indicated. Any use requires advance permission from G Dan Mitchell.

Reader Question: About Depth of Field

Lupine, Upper Sabrina Basin

I recently received an email from David, who has some questions about depth of field:

As you have a lot of experience of using the Fuji X-E1, may I please ask you for some advice regarding landscape focusing.

My aim is to use the 18-55mm kit lens with the majority of shots taken at the widest end. I have in mind setting the lens at Hyperfocal distances, based on a crop factor of 1.5 and a circle of confusion of 0.02. I think the first figure is reliable, but I’m not sure about the second in relation to the X-E1 – perhaps you could confirm.

I have already done some testing at home using the attached table (which come from the well respected DOFmaster site).

In my experiment I carefully measured distances at apertures of f8 and f11 using a tripod and a printed card as the subject. I set the lens manually at the hyperfocal distance, using the EVF distance scale. I was disappointed to find that the closest point of focus was not as sharp as I had hoped. Have you any idea why this may be?

I did a further test on aperture f11 and this time set the distance scale at 4 feet (2/3 of the way between 3 and 5 feet). This resulted in a sharp image from 3.5 feet. This would suggest that the distance scale is not accurate.

Any suggestions you have to overcome the problem would be much appreciated.

Let me preface my response on the depth of field (DOF) issue by congratulating you for taking the time to conduct your own experiments. One of the great things about digital cameras is that we don’t have to trust what we read — we can easily and quickly conduct the experiments ourselves. In addition to getting the answer to the question at hand, we end up knowing our gear at a much deeper and even intuitive level, which is extremely important when we are in the field and we don’t have time to ponder and calculate, but must instead make a photograph in the moment.

The rest of this post is going to be somewhat involved, so let me share a quick thought right at the beginning:

The usefulness of DOF calculators is very limited, as they are based on subjective assumptions that may not match what you are doing with your photographs. The best way to align your expectations with exposure choices is to test them yourself and evaluate images in the form that you most often produce — and not just at 100% magnification on a computer screen.

What is DOF? Essentially the depth of field is the distance range in front of and behind (unless you focus at infinity) the focus point within which subjects are likely to sharp enough to seem in focus when the photograph is viewed at some arbitrary magnification. This size of this range increases as we stop down (for example, going from f/2.8 to f/8 expands the DOF) and decreases as we open the aperture (going from f/8 to f/2.8 contracts DOF). This is a source of creative control for the photographer. A smaller aperture can allow subjects across a greater distance range to appear relatively sharp, while a larger aperture can keep the primary subject in focus while pleasingly “un-focusing” elements in front of and behind the primary focus point. Continue reading Reader Question: About Depth of Field