Tag Archives: Technique

Controlling Highlights (A Napkin Drawing)

Earlier this month some friends and I got together in San Francisco, as we do every month, to share prints and talk photography. One friend shared prints of some beautiful night photographs he had made of a San Francisco subject. As we looked for little things that could make excellent prints even better we got to talking about highlights and how to control them. There are quite a few ways to do this, and I drew a little picture on a napkin to illustrate one technique I sometimes use to get a bit more detail out of areas that appear to be nearly pure white. The drawing looked a lot like the following.

Drawing on a napkin

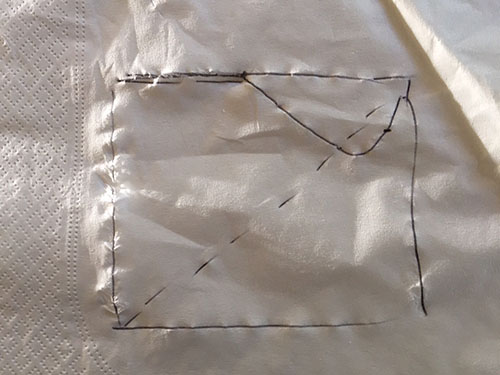
It doesn’t look like much here, but trust me when I say that it made sense at the time. My friend picked up the napkin and took it with him as a reminder… and then a few days later contacted me to say he had lost the “napkin notes” from our conversation. He asked if I would mind describing the technique again. I said I’d do it — and three weeks later I finally got around to writing it up in this article!

Photographers using digital cameras have to watch out for over-exposing highlights. While we can recover a lot of detail from dark shadows, especially with current digital cameras, there is much less headroom at the bright end of the spectrum. When the exposure is too bright it is easy to end up with lost details in high luminosity areas. Go a little too far and you end up with that bane of digital photography, blown highlights, where the bright areas are simply pure white, leaving little or no hope of recovering the lost details. Continue reading Controlling Highlights (A Napkin Drawing)

Sharpening Basics: A Primer

(Minor updates to this article were made in February 2019.)

Sharpening is a very important step for optimizing digital photograph files. If you let your camera save images in the common .jpg format (a compressed image format that is often used on the web) the camera is applying sharpening to the image produced by the camera sensor. If you use the raw format (a high quality format that retains the original sensor data of the exposure) you will find that the photograph looks soft until you apply sharpening during the post production phase.

Sharpening optimizes the visibility of details that are already in your photograph. It is a matter of more clearly revealing what is in the photograph than  a matter of creating detail where there was none. Most sharpening works by increasing the contrast between light and dark areas in the image — what we call sharpening as actually more about adjusting the relative brightness of adjacent portions of the photograph.

Typical sharpening

The image above is an example of a small section of a photograph.[1] It is a “100% magnification crop” of a tiny area from a much larger photograph made with a high megapixel DSLR camera. A “100% magnification crop” is an image displayed so that each pixel — or individual picture element — of the original photograph is displayed using a single pixel on the screen. (Things are a bit more complicated than that when using modern high-resolution monitors, though I’ll let that description stand for now.) 100% magnification crops let us look very closely at what is going on in photographas “at the pixel level.” In this case, the full original image from which these small examples were extracted would be equivalent to prints at a width of roughly 10-12 feet.

The right side of the example shows this tiny section of the photograph before sharpening. The left side shows the results of fairly typical sharpening. Continue reading Sharpening Basics: A Primer

Digital Exposure: Some Basic Rules (Morning Musings 1/10/15)

Earlier this week I read Alan Ross’s fine article about the zone system and the possibility of adapting it for use with digital photography. (“Can the Zone System Go Digital“) It is a fine summary of some very important principles of exposure, and it is one of the most straightforward and readable explanations of the basics concepts of zone system exposure I’ve seen. It also offers a useful way to apply zone system principles to shooting with digital cameras.

Shoreline Reflections, Tenaya Lake

I don’t use the zone system, but I do expose in ways that often have the same goals, especially when faced with subjects that have a very wide dynamic range (risking a loss of shadow and/or highlight detail) or, oddly, a very narrow dynamic range (where metering systems can try to turn everything neutral gray.) As I read his article I thought it might be fun to try to distill some of my basic principles for exposure down to a very short list. Here it is:

  • Protect the highlights! — Overexposed highlights and bright areas can completely lose detail if they are overexposed with digital photography, and these details may not be recoverable in post.
  • Watch out for dark tones that are too dark — If dark tones go too dark, they may need to be pulled back up in post, and noise, banding, and other artifacts can be the result of radical lightening of dark areas.
  • Consider the most important values in the scene, and adjust exposure to favor them — You may want to compensate for the camera’s tendency to want to make black and white tones end up gray in narrow dynamic range photographs
  • If important, subtle tonal variations are found in the shadows or in the highlights, consider offsetting exposure to protect them — You may want to underexpose just a bit to retain differences among tones in the bright areas. If there are a lot of important details in very dark shadows, you may wish to overexpose a bit.
  • Use the danged histogram — The RGB histogram display quickly tells you a lot of important things about your exposure.
  • Use the camera as the meter — Go ahead and make an exposure to test your settings. While there is a certain historical macho that says you should get it right in a single exposure, or that you should use a handheld meter, modern digital cameras can provide just as much information as external meters.
  • Don’t be afraid to bracket — Sometimes it is simply faster to make several bracketed exposures rather than to figure out one “perfect” one. That may sound like a photographic blasphemy to some… but it works!

Do you have other basic exposure rules that can be applied in a general way?


G Dan Mitchell is a California photographer and visual opportunist whose subjects include the Pacific coast, redwood forests, central California oak/grasslands, the Sierra Nevada, California deserts, urban landscapes, night photography, and more.
Blog | About | Flickr | Twitter | FacebookGoogle+ | 500px.com | LinkedIn | Email

Text, photographs, and other media are © Copyright G Dan Mitchell (or others when indicated) and are not in the public domain and may not be used on websites, blogs, or in other media without advance permission from G Dan Mitchell.

Testing? Testing? (Morning Musings 12/8/14)

Aperture Test Image
Aperture Test Image (1)

This morning I saw an article over at The Online Photographer (which you should be following) about a particular camera/lens combination and the process of doing a quick and informal test of that gear… right there in the kitchen.

I read a lot of photography questions about how this or that thing works, which setting is “best” for a particular result, what shutter speed range works for hand-held photography, how much the shadows can be pushed, whether a lens is sharp enough for some particular usage, and much more. Folks are often looking for quick answers — and who wouldn’t in most cases. However, the quick answers often turn out to be less clear than they might like, and sometimes the simplest questions can end up in controversy.

A simple answer is to simply try it out yourself!

The answers to many of the questions that we ask are too complex to lend themselves to absolute answers. Yet, we can often get a very good and quite accurate feeling for these things by just giving them a try. In some cases the “testing” can be very informal, while in others it might require just a bit more care and organization. But in our modern photographic world of digital cameras and computer post-processing and display the testing is much easier than it might have been in the past, and it is well within our grasp to do it ourselves.

I recall one of the first times I put this to good use with a digital camera. Continue reading Testing? Testing? (Morning Musings 12/8/14)