Reader “Paul” asks about gear for backcountry photography and how it may vary from trip to trip:
Dan, I’m curious. On your trips, what percentage of your pack is reserved for anything photographic in terms of weight? And what percentage is camping? Or does that change with your experience and knowing ahead of time what your photographic expectations are?
Great questions, Paul. The answer gets a bit complicated, but let me try to get to the heart of what I think is a question about how much weight/stuff to carry for various sorts of backcountry trips. (A longer article — My Backcountry Photography Equipment — goes into even more detail.)
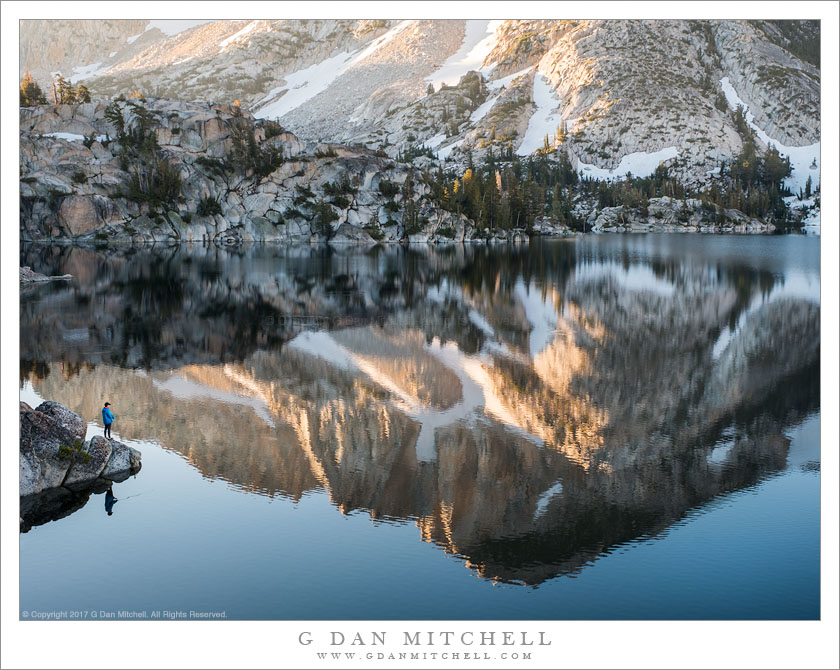
A solitary sunrise angler stands on shoreline rocks at an alpine Sierra Nevada lake reflecting a nearby peak
As you imply in your question, the answer varies — sometimes a lot — depending on a bunch of factors: how fit/young you are, the terrain you’ll cover, your willingness to bear weight for photography, whether your focus is more on miles covered per day or the photography itself, what you’ll do with the photographs after the trip, and more.
This is the first of what will be a series of articles looking at steps you can take to improve your chances of producing compelling photographs.
A recent stay in Yosemite Valley during my Yosemite Renaissance artist-in-residency reminded me again that while many aspects of photography are out of our control, there are things we can do to increase the odds of success.
On this visit I had three late April spring days to photograph in the park, which mostly means “in Yosemite Valley” at this time of year when the high country is still snowed in. By non-photography standards, the Valley was beautiful — if a bit crowded. The sun was out, the sky was blue, temperatures were comfortable, rivers were full of early snowmelt, the waterfalls were flowing, there were hints of green in the seasonal vegetation, and too many tourists were already showing up!
I did the usual things: I got up before dawn to find the early light. I stuck around until the last light faded. I returned to subjects that I knew from past experiences to be promising. I considered where the light would be at different times of day. I went looking for new subjects in likely places. I wandered. I kept my equipment with me at all times. I made photographs, and some of them are even pretty good, but at times it was hard to “see” something special in these conditions.
What’s not to like, right? From a photographer’s point of view these are not ideal conditions for photography. As pleasant as nice weather is for hiking and camping and picnicking, it can be hard to find exceptional photographs in such everyday light. I and many of my fellow Sierra photographers prefer interesting and unusual conditions — precipitation, broken light, mist and clouds, some haze.
On the final morning I was up and heading into the Valley well before sunrise. The light was unspectacular, with thick overcast cutting off the morning light. But then I caught sight a bit more light in the east, and soon I saw some breaks in the clouds. Within fifteen minutes the conditions opened up and I was treated to an exceptional spectacle of light and clouds and landscape that lasted for several hours, during which I photographed continuously. I made more interesting photographs during these few hours than during the rest of the visit.
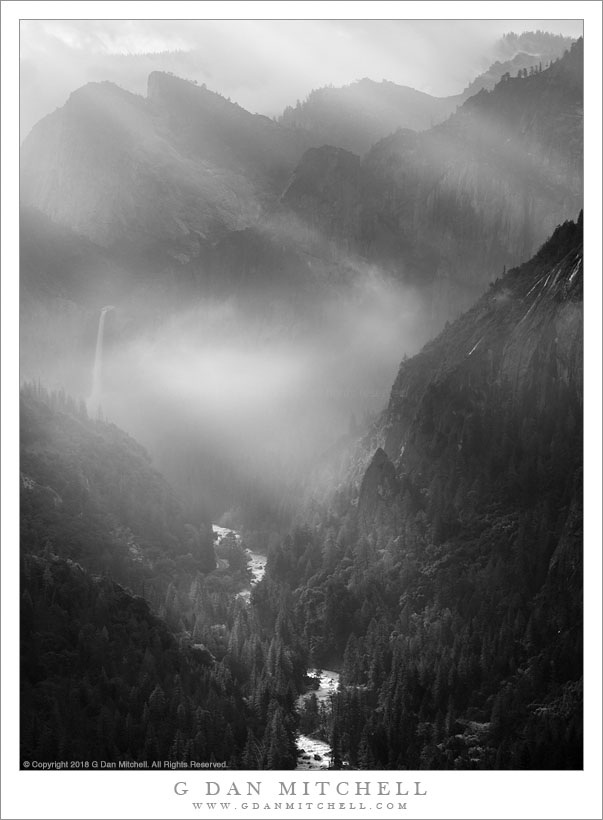
The morning sun breaks through clearing clouds above Merced Canyon
To state the obvious, “exceptional” and “unusual” conditions are not the norm. The blue-sky “blah” light is. If you show up on ten randomly selected days, nine of them are going to be, literally, unexceptional, and if you are looking for something unusual and beyond-the-norm you aren’t likely to find it.
“Je Suis Bleu” — Sidewalk, graffiti covered wall, and women (virtual and real) on a Paris street
Note: I originally published this article under the title, “Thinking About Travel Photography Gear.” Later I refocused in primarily on lenses for travel photography. Now a third major revision: I’m going back to the general subject of travel photography gear. (1/16/2025)
Recently I’ve noted people trying to determine what gear will work well for photography while traveling, what kind of camera and what lenses to take. I do a fair amount of travel photography, and I’ll going to summarize a few approaches that can work.
A starting assumption: There is no one “right” or “best” approach to photography while traveling, and what works for me may be far from ideal for you. I’m hopeful that this article may help you think carefully about what might work for you.
Cameras
What is “the best” travel camera? That is a tough question, and it might be better rephrased as “what is the best travel camera for me?” Is photography your main reason for traveling, do you simply want to record the experience, or something else? Are you traveling alone, with other photographers, or with others whose may not be photographers? Do you prefer to travel “heavy” — multiple bags and checked luggage — or you an ultra-light traveler who prefers to stick to carry-on only, even for long trips? When traveling do you think of yourself as a landscape photographer, a people photographer, a wildlife photographer, a street photographer, a lifestyle photographer, or something else?
With all of these possible variations, the right answer could be anything from your smart phone camera to a large, multiple lens system with tripod, or any of a number of intermediate options.
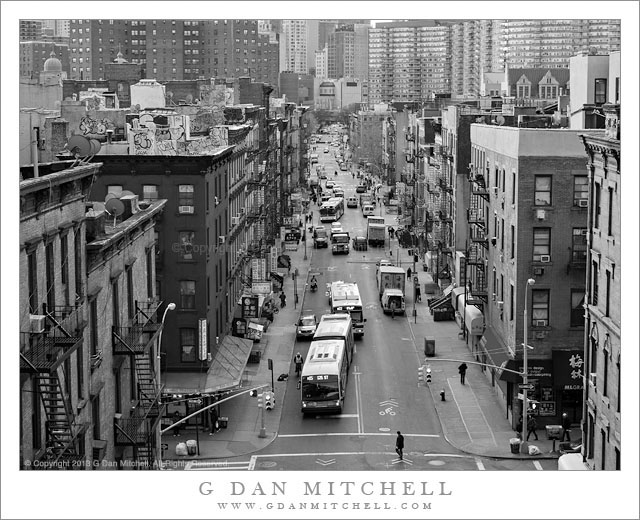
Chinatown, New York City
Cameras for Travel
A starting question might be, do you travel to make photographs, or do you make photographs to record your travels? In other words, is photography your primary reason for traveling, or is the travel itself the goal and photography is simply a way to record your experience? Or perhaps a better question might be, where do place yourself on that spectrum?
If photography is your main reason for travel — for example you head to Africa to photograph big game or you visit Europe to photograph architecture, you photograph landscapes in Iceland, or you do street photography in Asia, and so on — you are likely to use pretty much the same gear that you would use for these subjects if you were not traveling, perhaps with some modification for practical reasons like weight and bulk. In this case, there’s not a lot of advice I can give you, and you probably already know what gear you’ll need and be willing/able to transport.
If travel itself is your main goal — the experiences of visiting fascinating places, meeting interesting people, enjoying local food, sharing the experience with family and friends — you may be less inclined to be weighed down by lots of cumbersome equipment.
An incomplete list of options:
Smartphone. Today’s smartphones are quite powerful and can produce very good quality images, especially if your goal is to share electronically with friends (and followers) online, via email, in messaging apps. In fact, the phone is the fastest and easiest way to get your pictures online. You already have the phone, so you probably don’t need to get any gear at all!
Small all-in-one cameras: Sometimes referred to as “”point and shoot” (or P&S” cameras, fifteen or twenty years ago these were the dominant cameras you would see while traveling. Most are small and have a built-in zoom lens. They use smaller sensors than most dedicated cameras today (though there are newer cameras that use larger formats today), producing image quality that is excellent for online sharing and even for relatively small prints. These cameras are a compromise between the ease of using a smartphone and the potential higher quality but larger size of “big cameras.”
Fixed lens cameras: Decades ago, “fixed lens” film cameras were the norm. They have a built-in lens with a single focal length.. They have advantages and disadvantages. Pluses include their typically small size and generally excellent image quality. Downsides include a lack of flexibility that zoom lenses or interchangeable lenses provide.
Smaller interchangeable lens cameras: Today some manufacturers are making relatively small mirrorless cameras that support interchangeable lenses. The smallest of these use the “micro-four-thirds” format, with the next step up being cameras using APS-C (or “cropped”) sensors. They are typically a bit too large to be regarded as “pocket” cameras, but they fit conveniently into typical travel bags — slings, purses, fanny packs, shoulder bags, and similar. The user can go in a range of directions with lens choices — a single zoom, a single prime lens, sets of lenses. Image quality can be excellent, good enough for prints much larger than most travelers will ever make.
Full-frame cameras: A decade ago this meant a DSLR, but today it more likely means a mirrorless camera. Because they use the larger full-frame sensor format, the entire system typically ends up being larger than the smaller format options, though this can be minimized with careful lens and body selection. And, of course, travelers with strong backs can bring along whatever big lenses and other accessories they want to cart around — and large bags and cases to carry them.
Larger formats: The sky is the limit here, and some people are starting to travel with the digital medium format or mini medium format (miniMF) cameras and lenses. There’s no question that these cameras are capable of producing excellent quality images — but here we’re starting to enter the “photography is the main goal” territory. These are remarkable cameras for some kinds of photography. They are smaller than their medium format film forebears, but they are still quite large and likely overkill for how most travelers photograph and for what they will do with the pictures.
So, which is right for you? I cannot tell you that — it is a personal matter. And I’m certainly not going to tell you that one format, one brand, one camera, one kind of lens is “the best for travel.” (I will suggest that you regard anyone who does say such things with more than a bit of suspicion.) It is highly subjective and contextual. Something from any of the categories above could be ideal for you, depending upon your goals and how you travel.
However, I do have some general advice.
If you already have something that will work, give that a try first rather than buying a lot of new gear. If your gear is large, you might be able to downsize by using a prime lens or a small zoom. Your existing equipment may not be perfect but — secret revealed! — no gear is. All photography equipment is a compromise between image quality, operational speed, flexibility, cost, size, weight, and more.
Err on the side of less gear rather than too much. There is always a fear that if you don’t have the best thing or all of the things and you might encounter a photograph for which you are not perfectly equipped. It is true! That is going to happen, no matter how much gear you bring. However, if you carried everything that you might possibly need in the most unlikely situations you are going to be burdened with so much gear that there’s a good chance you’ll end up missing other photographs.
If you value traveling light — like we do — then think of camera gear the same way you think of other travel equipment, clothes, and so on. Be very leery about bringing things that you might, maybe need. Bring what you know you’ll use. And consider the value of smaller equipment — perhaps a smaller format, smaller lenses, and so forth.
Think hard about what you tend to photograph when traveling and how you photograph it. Do you want to stop for 10-15 minutes in one place to carefully work out a shot, or will you wait a half hour for the light to be perfect? Or will you prefer to live in the moment, enjoy the experience, and use the camera to capture some record of all of that.
When acquiring new equipment — especially if you are new to this kind of photography — go slow. If you have the funds you could go out and buy an expensive camera, a ton of lenses, and other accessories. However, until you have done some photography you are not likely to be the smartest shopper — it is hard to assess the value of equipment in the context of your photography until you have some experience under your belt.
Lenses for Travel
Rather than trying to answer the “what lens should I bring?” question, I’ll suggest a few approaches and briefly describe some pluses and minuses of each.
One zoom lens
A single zoom lens that covers sufficient focal length range, preferably with IS and a f/2.8 aperture might be all you need. While such a lens is not small, it is quite versatile. Especially if the lens or camera has lens image stabilization (IS) and/or in-body image stabilization (IBIS). it will work in relatively low light in many situations, and it can work for everything from casual portraits to wide-angle photographs in constrained spaces. A “mid range zoom” lens can do the trick, whether it is one of the ubiquitous “kit zooms” or a more expensive f/2.8 zoom. Obviously, many of the small “all in one” cameras come with this kind of lens.
Pluses
One lens stays on the body all the time.
IS helps with handheld shots in low light.
The lens covers focal lengths most often needed.
Good image quality. Weight and bulk are less of an issue if you stick on only one lens.
Minuses
These lenses are usually not small.
You will give up some ultra-wide and telephoto options.
A big lens can make you look like a “photo tourist.”
Largest apertures not as big as you could get from primes.
No backup lens if this lens has a problem.
A woman walks into an alley past a smoking bicyclist, Florence/Firenze, Italy
One zoom lens with large focal length range
Some zoom lenses cover a very large focal length range (18-300mm!) with variable aperture. As with the first option, this provides a great deal of versatility for folks who want a larger selection of focal lengths, but who don’t want to mess around with multiple lenses.
Pluses
One lens stays on the body the entire time.
Decent-to-good (but probably not stellar) image quality.
Excellent focal length coverage for diverse subjects.
Minuses
Not the best lenses optically, though good enough for many purposes.
Lenses can be relatively large.
More limited low light options. (Use flash?)
Big lens can make you look like a “photo tourist.”
No backup lens if your lens has a problem.
A single prime
Before the era of zoom lenses, it was not unusual for photographers to head out with only a single prime lens with a decently large aperture. (This could be an interchangeable lens camera with a single prime or a rangefinder style camera with a fixed focal length built-in lens.)
Pluses
The ultimate in simplicity and light weight.
Excellent image quality.
Good low light coverage with a large aperture.
You may look less like a tourist.
Minuses
No focal length flexibility. (Though some systems allow add on telephoto and wide angle converters.)
No backup lens if your lens has a problem.
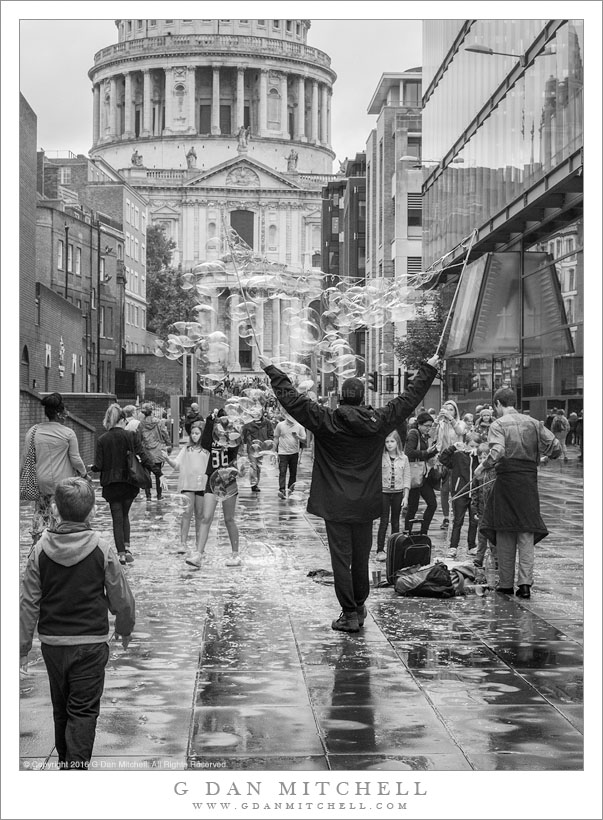
A man making soap bubbles for the crowd in London
A few primes
Pluses
Can be small and light.
Good low light coverage.
Excellent image quality.
You may look less like a tourist.
Minuses
A few small primes may add up to the weight/bulk of one zoom.
Need to switch lenses more often.
Less focal length flexibility than a zoom.
Multiple zooms
Pluses
Lots of flexibility.
Good zooms provide excellent image quality.
Minuses
System quickly balloons in size and weight.
Probably need dedicated photographic bag or backpack.
You not only look like a tourist… you look like a tourist carrying lots of expensive stuff, which is not always ideal.
Zoom(s) augmented by a large aperture prime
One zoom can cover ranges where flexibility is desired, and a smaller prime can provide a larger aperture option and/or coverage of a focal length beyond the capability of your zoom — for example wider or longer.
Pluses
You get the flexibility of a zoom.
You get the large aperture of a prime.
Fine image quality.
Minuses
Do you take a prime in the focal length range of your zoom (for low light) or a different range (covering different uses)?
Multiple lenses to juggle.
Weight and bulk increase a bit.
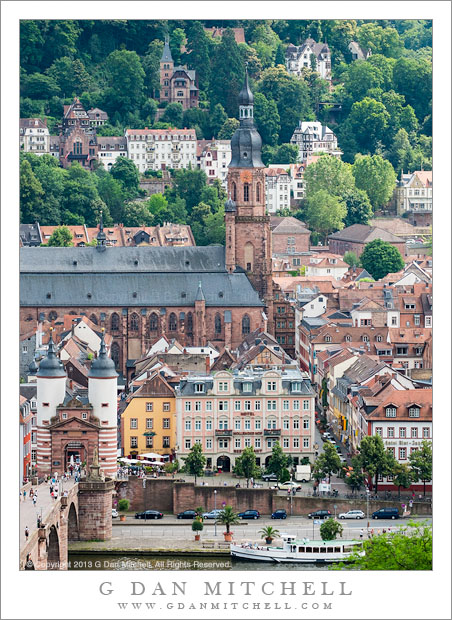
The Karl Theodor Bridge, the old bridge, the Heiliggeistekirche, and portions of Altstadt-Heidelberg, Germany
Primes augmented by (most likely one) zoom.
For example, take primes for core use, but add a zoom telephoto.
Pluses
Good image quality.
Small and light system with primes for most photography.
You look less like a tourist when using the primes.
Focal length flexibility in range covered by the zoom.
Minuses
Not as small and light as primes-only system.
The not-a-tourist impression is lost when you attach that zoom!
The Answer
I know you’d like The Best Answer… but there isn’t one! No solution is perfect, and each photographer will likely balance the pluses and minuses in a different way. One traveler will swear by smart phone photography — and with good reasons. Another will carry a small fixed lens camera. Others sill love the all-in-one cameras. I like an APS-C system with a few primes. Some are happy to travel with their full-frame systems and a bag of lenses. You have to figure out which is the best fit for you.
What I do
Over the years I have used a range of camera gear while traveling: a large DSLR system with zoom lenses, my smartphone, a small point-and-shoot style camera, various APS-C format cameras, and so forth. As a photographer, I’m not ready to give up good quality equipment that allows me to shoot my preferred subjects and make large prints from the photographs I bring home. in fact, for me the photography itself is high on my list of reasons for traveling. Yet I also prefer to travel light, going “carry-on luggage only” even for multi-week overseas trips.
Although I use a big, heavy full-frame system for much of my non-travel photography, the best solution for me has turned out to be a 1.5x cropped sensor mirrorless body with a small selection of lenses, mostly primes — sometimes augmented by a zoom. (Warning: I’m NOT saying that this is the best option for everyone — just what has worked for me.)
For more than a decade I have been using various small APS-C cameras from Fujifilm — a couple of their little XE cameras, the rangefinder-style XPro, and currently the XT5. They supply plenty of image quality and resolution, and I can reliably produce excellent 20″ x 30″ prints and sometimes larger. I like small prime lenses, especially a 27mm “pancake” lens that is on my camera most of the time. I usually add a wider lens and one or two longer lenses, though I rarely take all of them into the field — I prefer to pick the lenses I’ll need and leave others in the hotel safe. On a few occasions I have relied on the 27mm plus a 16-55mm zoom. This gear is small enough that I can still stick to carry-on luggage, even for most long trips, and it doesn’t weigh me down when I’m out and about. The entire kit, plus my small laptop and a few other items, fits into a medium-size messenger bag that goes under the seat on flights.
One other advantage of this system is that it gives me some redundancy in case something happens to one of my lenses. If you carry only one lens and it is lost or stolen or broken you are out of luck. Same with the all-in-one options or the single-zoom option. Of course, you could revert to using your smartphone if something happens to your one-lens system. You could also try to replace gear locally, though that isn’t always easy nor is it how you want to spend your valuable vacation/travel time.
UPDATE: As of 2020 I am no longer posting annual updates concerning this subject — and I am editing older posts on the subject in light of the need to be more responsible about not encouraging the onslaught. I also no longer recommend going to the Valley to see it. Unfortunately, too much exposure (yes, I played a part in it, unfortunately) has led to absurd crowds, traffic jams, littering, destruction of areas in the Valley where too many people go to see it… and the park has increasingly — and appropriately — cracked down. Parking options have been eliminated, at least one viewing location has been closed. Good news! The rest of Yosemite Valley is still there and often exceptionally beautiful at this time of year.
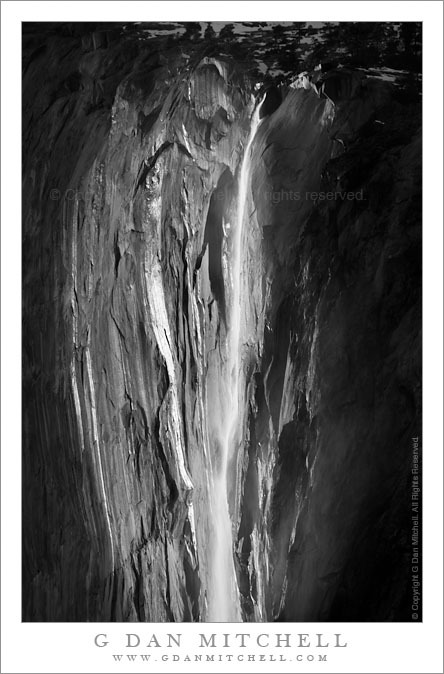
Horsetail Fall, Early Evening
Every winter, for roughly a week or so starting just after mid-February, the sun and various geological features line up so that sunset light falls on the seasonal and ephemeral Horsetail Fall near the east end of the face of El Capitan. Sometimes the light of the setting sun may illuminate this waterfall from behind and briefly make the waterfall and its misty spray glow in sunset colors.
Since it is that time of year again, I’m going to briefly share a few bits of information and perspective about Yosemite Valley’s Horsetail Fall. For more, see an earlier article.
But before you get too excited…
This is another extremely dry winter in California, with Sierra snowpack far below normal. There is very little snow in the drainage the feeds the fall, and forecasts suggest that it will remain dry. In other words, there probably won’t be enough water to start the fall.
The “event” has gotten out of control as thousands of people showed, parking everywhere and trampling through forests. The park service decided that something has to change. This year access to the typical viewpoints will be more difficult, with extremely limited parking (by advance permit only), and roads near the viewing area will be closed to parking or shut down completely. If you don’t have one of those permits, you have a long walk ahead of you… and probably a long return walk in the dark.
Third, what you see in photographs (including my own) is not what you are likely to see in person.
My best advice this year? Probably don’t bother. Between the uncooperative weather and the access restrictions, you are perhaps more likely to experience a #HorseFailFall than Horsetail Fall.
Also, while seeing this phenomenon can be special, it is but one of many, many special experiences to be found in the Sierra. Too often these days, social media convinces use that such experiences are Super Mega Peak Astonishing Ultra Wonders. This poses some dangers, and you should consider resisting. It falsely transforms quiet, contemplative experiences into the equivalent of a sports event, unfortunately creating greater distance between observers and the experience they crave. It also brings crowd that threaten the very places that they come to see.
Perhaps consider something else?
Fortunately, winter in Yosemite Valley has a whole lot to offer besides this event. Fog often forms in quiet meadows at dawn, clouds frequently float among cliffs and peaks, you might get lucky and see some snow, some wildlife is much easier to see in winter, the crowds are generally a lot smaller, and some interesting events take place, such as the Yosemite Renaissance Exhibit opening near the end of the month in the Visitor Center Museum Gallery. (I’ll be in the park during this period as a Yosemite Renaissance “artist in residence,” photographing and attending the opening of the exhibit.)
Photographer and visual opportunist. Daily photos since 2005, plus articles, reviews, news, and ideas.
Manage Consent
To provide the best experiences, we use technologies like cookies to store and/or access device information. Consenting to these technologies will allow us to process data such as browsing behavior or unique IDs on this site. Not consenting or withdrawing consent, may adversely affect certain features and functions.
Functional
Always active
The technical storage or access is strictly necessary for the legitimate purpose of enabling the use of a specific service explicitly requested by the subscriber or user, or for the sole purpose of carrying out the transmission of a communication over an electronic communications network.
Preferences
The technical storage or access is necessary for the legitimate purpose of storing preferences that are not requested by the subscriber or user.
Statistics
The technical storage or access that is used exclusively for statistical purposes.The technical storage or access that is used exclusively for anonymous statistical purposes. Without a subpoena, voluntary compliance on the part of your Internet Service Provider, or additional records from a third party, information stored or retrieved for this purpose alone cannot usually be used to identify you.
Marketing
The technical storage or access is required to create user profiles to send advertising, or to track the user on a website or across several websites for similar marketing purposes.