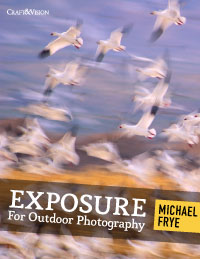
Craft and Vision has just released Michael Frye’s new ebook, Exposure for Outdoor Photography. The book seems to be directed at the many folks who own DSLRs or non-DSLR cameras and are striving to advance beyond the point and shoot approach to their photography. The book takes a straightforward approach to some of the most important topics related to exposure. It begins with a basic description of, well, the basics of exposure – shutter speed, aperture, and ISO and some of the important terminology and concepts related to these factors. Michael keeps the level of detail to a minimum, but the basics are all there, including an explanation of the how and why of using the histogram display – which is probably just about exactly the right approach for his intended audience.
After getting the basics out of the way, the book moves to a series of ten “cases studies,” each of which uses one of his photographs to explore a particular aspect of exposure. The subjects of the case studies include using the histogram, dealing with both large and small depth of field, freezing motion or controlling motion blur, the tradeoffs of moving to higher ISO, recovering highlights in bright scenes, how to handle extremely bright highlights such as direct sun, and a nod to the zone system (in very simplified form) and HDR and exposure blending concepts. Rather than presenting the concepts in theoretical form, he uses his one photographs to provide practical examples for the case studies.
There are a number of things I appreciate about the book, and I think many readers may also agree:
- Rather than presenting rules that you must follow, Michael presents the concepts and explains/demonstrates the effects of some of the choice under discussion. He is careful to point out that there usually is no “perfect” exposure, and that there are different ways to get the result you have in mind. (Near the end of the book he even provides some examples of photographs that intentionally “violate” the exposure rules.)
- He strikes a good balance between too little and too much detail. He avoids the pitfalls of trying to make things so simple that they end up being simple-minded and of trying to cover all possibilities to the extent that many readers simply end up confused. This is probably an ideal balance for photographers who are taking first steps towards fuller understanding and control of exposure in their photographs.
- The case study photographs effectively illustrate the concepts that he covers. In addition, many of them are just plain fine photographs. (Two of my favorites are the Tuolumne Meadows photograph and one of geese in beautiful morning light.)
The ebook concept seems to be catching on quickly and there are plenty of good reasons for this. The visual quality of the text and illustrations is excellent. The books can be read on a laptop or a tablet. They are easy to purchase, and the cost is very low.
The book is now available from site affiliate Craft And Vision, and I understand that there may be a discount price during the first few days of availability.
G Dan Mitchell is a California photographer whose subjects include the Pacific coast, redwood forests, central California oak/grasslands, the Sierra Nevada, California deserts, urban landscapes, night photography, and more.
Blog | About | Flickr | Twitter | Facebook | Google+ | 500px.com | LinkedIn | Email
Text, photographs, and other media are © Copyright G Dan Mitchell (or others when indicated) and are not in the public domain and may not be used on websites, blogs, or in other media without advance permission from G Dan Mitchell.
