Category Archives: Technique

Camera Stability and Long Lenses

I responded to a question somewhere else and thought that it might be useful to share the response here, too. A photographer asked some questions about using long focal length telephoto lenses for landscape photography and how to deal with the issue of camera/lens stability, bringing up related questions about things like live view modes, mirror lockup, image-stabilization, and so forth. Here is what I wrote in response…

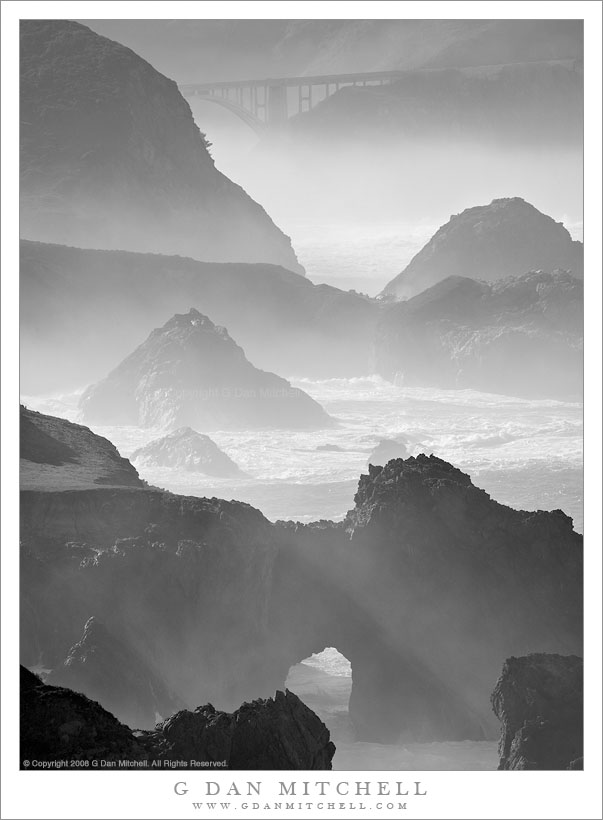
Rocky Creek Bridge, Surf and Fog
Black and white photograph of Rocky Creek Bridge with winter storm surf and fog. Big Sur coastline, California.

If you are shooting landscapes from the tripod…

  • Do use live view – it is the mode that introduces the least amount of shutter vibration.
  • Either mode 1 or 2 will perform essentially equally well when it comes to shutter vibration. (In both cases, there really isn’t any shutter motion vibration before the exposure since it is initiated electronically.
  • If you use a remote release (and you do, right?!) then there is no reason to use any delay setting on the camera to avoid vibration. (Many cameras have settings for 2 second or 10 second delays – mostly there so you can run and get in the photo, too!)
  • Mirror lockup is irrelevant in live view. The mirror is up by default in live view.  To be even more explicit, live view and MLU are mutually exclusive modes – they cannot be used at the same time.
  • After touching the camera, moving the tripod, etc., wait a few seconds for vibrations to dissipate before making your exposure. I  think that 2-3 seconds is sufficient, though some folks will claim that even longer might help.
  • Speaking of this, I would tend to avoid using either auto-focus (AF) mode when making landscape photographs with such a long lens. Either can introduce some amount of vibration to the system, but especially the mode that momentarily flips the mirror down, auto-focuses in the usual manner, then flips the mirror up to make the shot in live view. I prefer to manually focus at 10x magnification. If you must autofocus, do so before switching to live view mode, and then turn AF off before making the exposure.
  • Realize that the large area of these big lenses, combined with their very long focal lengths and great magnification, make the system far more susceptible to vibration from air movement. Even relatively weak breezes can create enough vibration to create a bit of blur and soften the image. Continue reading Camera Stability and Long Lenses

Reader Question: One Lens for Landscape and Wildflowers on Hikes?

From time to time blog readers email me questions about photography subjects. When possible I like to answer them here so that I can share the answer with others who might be interested. Here is a recent question:

“If you were going on a hike to capture landscape and wildflowers, and you could only take one lens, which one and why?”

In some ways that is  a very simple question, but it other ways the answer can be quite involved. Since the question did begin with, “If you were…”, let me start out by literally saying a bit about my own photography – but reminding readers that my approach is individual and idiosyncratic and may not match up with your preferences at all.

If the goal was to cover as much ground as possible in a single lens, and accept some photographic limitations in exchange for carrying less gear, with my Canon full-frame DSLR system I would most likely use my Canon EF 24-105mm f/4 L. On full-frame, the 24mm focal length covers a pretty decent wide angle range, and 105mm is long enough for many subjects. The lens also focuses reasonably close – though not macro-close – and the image stabilization feature is useful in situations where I might want to hand-hold the camera. On a week-long backpacking trip through a high and remote section of the Sierra a few years ago, I used only this lens (and tripod, remote release, a few filters, etc) and came back with good results. To extend the usefulness of the lens for close-up flower photography I sometimes carry an extension tube, though others might just bring along a close-up “filter” or two.

There are things that I would miss with this single-lens setup. A personal preference in my shooting is to work with longer focal lengths, so for me having nothing longer than 105mm would seem like a bit of a restriction. And while this lens plus the extension tube works pretty well, it won’t be as good as a dedicated macro lens.

Another alternative that I’ve thought about but have not yet tried (since I haven’t had the gear long enough just yet) would be to use my small Fujifilm X-E1 (seen”Fujifilm X-E1: From DSLR to Mirrorless“) with the 60mm macro and perhaps the fine little 18-55mm zoom. I know that is more than one lens, but the total kit size is smaller/lighter than my full-frame DSLR. You could go with just the excellent little zoom plus a close up filter or two as an alternative. I use this particular brand/model and like it a lot, but there are alternatives from other manufacturers that also have a lot of fans.

Moving on from what I might use, let’s briefly consider some other options that might appeal to other photographers.

If you are primarily interested in the wildflowers and are a very serious photographer, you might prefer to simply carry a dedicated macro lens of whatever focal length seems best for you. This will be your best bet for close-up wildflower photography and, accepting the limitations of having only a single focal length, will produce excellent image quality for non-macro subjects as well.

Another option that would work well for a lot of people is one of the entry-level DSLRs (like the Canon t1i-t5i series or alternatives) with the “kit” lens in the 18-55mm range plus one or more close-up filters. These can produce quite decent image quality and the package is small, light, versatile, and not too costly.

This begins to lead to the question of what your primary goals are in your hiking photography. Are you a very serious photographer who regularly produces large and high quality prints? Or, at the opposite end of the spectrum, are you a much more casual photographer who wants to bring back some beautiful records of your experience and share them with friends and family, perhaps mostly online? More than likely, you might have to determine where you fit between the extreme ends of this spectrum. How important is the weight/bulk of the equipment? Are you going to grab shots handheld or stop and use a tripod?

For some who are more concerned with the weight/bulk issues and perhaps not likely to make 20″ x 30″ prints, there are lots of smaller, lighter and often less expensive options that can be very good choices. These include some of the smaller and lighter mirrorless cameras such as the Fujifilm model I mentioned above (at the high end), and also some of the point and shoot cameras, many of which can produce excellent photographs.

Good luck with your choice… and with your photography!

Articles in the “reader questions” series:


G Dan Mitchell is a California photographer and visual opportunist whose subjects include the Pacific coast, redwood forests, central California oak/grasslands, the Sierra Nevada, California deserts, urban landscapes, night photography, and more.
Blog | About | Flickr | Twitter | Facebook | Google+ | 500px.com | LinkedIn | Email

Text, photographs, and other media are © Copyright G Dan Mitchell (or others when indicated) and are not in the public domain and may not be used on websites, blogs, or in other media without advance permission from G Dan Mitchell.

Post-Processing: A Shadow Recovery Example

(In another forum someone asked a question – actually, more like posed a challenge – related to how much usable detail and quality could be extracted from a raw file that contained areas of very low luminosity, as could happen with a badly underexposed image or with an image of a scene with a very large dynamic range. Since I went to the work of responding and illustrating my response, I figured that I might as well share it here, too. With minor revisions, here it is.)

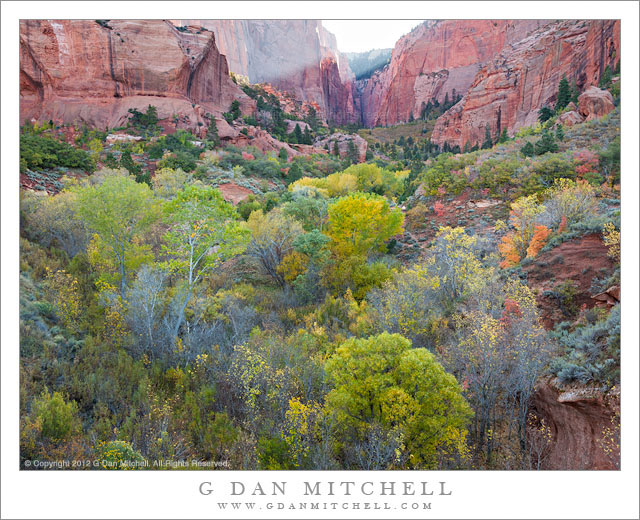
First, I actually have a “real” version of this photograph in which highlights were slightly blown, but which I preferred to use since I could bring them back in post and get a bit more shadow detail to start with. (It looks a bit bright to me as an on-screen jpg, but it makes a fine print.) That photograph ended up looking like this:

Kolob Canyon, Morning - Morning light slants over the top of sandstone cliffs above early autumn foliage in Kolob Canyon, Zion National Park
Morning light slants over the top of sandstone cliffs above early autumn foliage in Kolob Canyon, Zion National Park

This photograph and the other I’ll move to below were both shot from a tripod with a Canon EOS 5D Mark II at ISO 100 using the Canon EF 24-105mm f/4L IS at f/16. While the “keeper” used for the photograph above had a 1/4 second exposure, the example I’ll use below was shot at 1/30 second.

The exposure challenge in this scene was the very large dynamic range between the bright spot of sky at the head of the canyon and the much darker colorful foliage in relatively deep shadow in the foreground. Exposing for optimal quality in the foreground would completely blow out the sky, while exposing for the sky would necessarily grossly underexpose the foreground.

I originally thought that I might like to have four bracketed exposures in case that would let me produce a better final image via layer blending, but it turned out to be unnecessary and the final image (as shown above) has a single source file with no blending. However, this means that I still happen to have one very badly underexposed (by three stops) version at 1/30 second which I’ll use here as the starting point for what I plan to illustrate in this post. Follow along with me and see what I can do with the very underexposed version of the file… Continue reading Post-Processing: A Shadow Recovery Example

Some Thoughts on Aperture and DOF and Related Issues

(This post is slightly adapted from something I recently posted in a photography forum in which hyperfocal distance, “DOF calculation” software, and related issues were under discussion.)

Shooting as a way to learn to understand how things like depth of field or “hyperfocal distance” work is a great idea – it is perhaps the best way to understand these concepts. I firmly believe that it is better than relying on tools such as software DOF (“depth of field”) calculators or tables. Fortunately, it is easy to do some basic experiments related to aperture and DOF and the so-called hyperfocal distance.

(The term hyperfocal distance can be interpreted in a couple of ways. In photography, this is often thought of as the distance at which you might focus in order to place objects at different distances in focus. If there is an object that is 15 feet from the camera and there are important subjects at infinity, the hyperfocal distance lies beyond the object that is 15 feet away and closer than the far away objects that might be in focus with the lens set to “infinity.”)

To find out about the effect of aperture on DOF, try the following:

  1. Put the camera on a tripod and compose some reasonable test image that includes subjects at various distances from the camera position, with a primary subject somewhere between the closest and the furthest.
  2. Focus on your primary subject within the scene.
  3. Shoot a series of images at apertures ranging from the largest to perhaps f/16 – shoot at f/1.4, f/2, f/2.8, etc. You might want to go as far as f/22 on full frame.*
  4. If you want to be a bit more methodical, you can use your DOF tables/software to “calculate” your hyperfocal distance, focus there, and repeat the process – but, frankly, I wouldn’t bother.
  5. Spend some time – likely well under an hour – looking over the results on your computer. If possible, make a few small prints to confirm the relevance (or not) of what you observe on the screen.

Another great way to understand the effect of aperture on the depth of field in your shot is to shoot in live view mode on your DSLR. Here you can press the DOF preview button, zoom in the live view display to 5x or 10x magnification, and pan around the magnified image on the rear display to see a very good approximation of the effect of your aperture choice on elements of the scene at various distances from the camera.

SIMPLIFICATION: A SECRET

Let me share a little secret. From reading some photography forum posts, you might get the idea that lots of photographers are going around making careful and technical calculations of precise hyperfocal distance and DOF and all the rest and then making exactingly accurate choices about aperture for each shot. In general, it doesn’t work that way in the real world, where photographers often tend to select aperture in basically three ways:

  1. In a shot where the subject doesn’t have a lot of depth and DOF isn’t really an issue, we tend to shoot at some default aperture that we believe is more or less optimal for overall resolution, corner resolution, and perhaps vignetting. On full frame, this might frequently be roughly f/8, though there are reasons to vary from that a bit sometimes.
  2. When working a subject on which we want very large DOF, we tend to go straight to the smallest aperture that we feel will produce large DOF and very good resolution. For me, this is typically f/16 on full frame, it might be no smaller than f/11 on cropped sensor cameras. There are situations in which I might use a smaller aperture, but they are very rare and will involve acceptance of some tradeoffs.
  3. When faced with a shot in which we want very narrow DOF, we tend to open up as much as we think we can, perhaps tending toward the largest aperture on the lens we are using. There are some additional factors to consider here, but I’ll leave them out for now in the spirit of simplifying.

So, a simple generalized approach:

  • Shoot at some middle-of-the-road aperture when DOF isn’t a major concern.
  • Shoot at the smallest acceptable aperture when you want large DOF – f/16 on full-frame or f/8-f/11 on crop.
  • Open way up when you want to minimize DOF.

This approach works in a wide range of real-world photographic situations, and it is especially useful to begin with it when you have to work quickly. There will be situations in which these are simply starting points, and you’ll need to make some modifications – for example, in very low light you might not be able to use that very small aperture if you are shooting hand-held, or your largest aperture might produce DOF that is too narrow for some subjects, and so on. But starting with this simple basic concept, using live view DOF preview when appropriate, and learning from experience will likely move you a lot further along on the road towards understanding and making effective use of aperture/DOF than trying to rely on some DOF calculator. (Depite their appearance of accuracy, these calculators depend on a bunch of assumptions that may not match up with your photography.)

* You can stop down further on cameras with larger sensors before you run into issues with diffraction blur, a softening of the overall image that occurs with the smallest apertures. To generalize, while you can stop down to roughly f/16 on a full frame and still produce very sharp images, you might want to avoid such a small aperture on your cropped sensor DSLR, perhaps avoiding anything smaller than about f/11… and you might want to be a bit cautious about using f/11.

© Copyright 2012 G Dan Mitchell – all rights reserved.

G Dan Mitchell is a California photographer whose subjects include the Pacific coast, redwood forests, central California oak/grasslands, the Sierra Nevada, California deserts, urban landscapes, night photography, and more.
Blog | About | Flickr | Twitter | FacebookGoogle+ | 500px.com | LinkedIn | Email

Text, photographs, and other media are © Copyright G Dan Mitchell (or others when indicated) and are not in the public domain and may not be used on websites, blogs, or in other media without advance permission from G Dan Mitchell.