Red Cliffs, Dawn

Red Cliffs, Dawn
Red Cliffs, Dawn

The Red Cliffs (also called the “Red Cathedral”) are close to the famous spire of Manly Beacon at Zabriskie Point, and off the right a bit from the typical vantage points. The light was quite special – at least when not blocked by the clouds! – on this morning. These interesting clouds against the pastel blue sky first caught my attention, and were actually my primary interest in making this photograph. While the early light was on the clouds, some soft light also filtered through low clouds to the east and created a subtle glow on the face of this feature.

The Red Cliffs are really an amazing feature, though are often overlooked in favor of the more prominent and iconic Manly Beacon. The cliffs can often can be difficult to photograph – at least for me! When more direct light hits them the large dynamic contrasts between the areas in the light and the much darker shadows are tricky to handle, so this cloud-softened light seemed like just the right thing.

And, yes, I was at Zabriskie Point. It is a long story, but I have mentioned before that I have a personal project to photograph things other than the iconic scenes of Zabriskie. (Which is not to say that I won’t point my camera at those while I’m there it it turns out to be worth it!)


Leave a comment or question using the form. (If you are reading this on the home page, click the article title to see the full article and the comment form.

G Dan Mitchell is a California photographer and visual opportunist. His book, “California’s Fall Color: A Photographer’s Guide to Autumn in the Sierra” (Heyday Books) is available directly from him. Blog | Bluesky | Mastodon | Substack Notes | Flickr | Email

All media © Copyright G Dan Mitchell and others.

Wildflower Photographs: A Quick Exposure Tip

Since wildflower season is upon us, I have a quick tip that you might find useful if you photograph intensely colorful flowers such as California golden poppies or similar seasonal wildflowers. (The tip is also useful for photographing fall foliage.)

Let’s imagine a photograph of California golden poppies in which the flowers fill the frame – either because you photograph a large dense field of poppies or because you shoot a smaller group from a close distance. You use the automatic exposure setting on your camera and make a photograph… and you notice that the color is ridiculously intense and that in the areas of most intense color almost all detail has been lost. It dawns on you – correctly, in all likelihood – that you probably over-exposed and blew out the bright highlights of the flowers.

But you are a smart photographer. You know that your camera has a histogram display that will show the brightness across the dynamic range that your camera can record. (It will probably record a somewhat larger range if you shoot in raw mode, but being a “smart photographer” you are doing that anyway. :-) You compose your shot and this time decide to work in manual mode rather than relying on automatic exposure settings. If you have live view you might look at the histogram as you focus. If you don’t, you make the shot and check the histogram right afterwards. In both cases, the histogram display looks pretty good – the curve doesn’t flatten out against the right side of the display but it is close because you “exposed to the right,” and the left end of the curve doesn’t hit or go to far into the “dark” end of the display. But when you check out your photographs later on, it seems like the brightest areas of the flowers are still too bright – they seem blown out and some detail is gone.

What is going on? In all likelihood, the image is much stronger in the red channel than in the green or blue channels since the color of these flowers is very strong in that channel. But your automatic exposure system has to make a best guess based more or less on an average of the three channels, and it “overlooks” the unbalanced light that is weak in the blue and green channels but too strong in the red channel. The normal histogram does the same thing. It shows an overall luminosity level that reflects the sum or average of the three individual color channels. For fairly normal subjects this works pretty well in most cases, but with subjects that are intensely bright in one channel all bets are off.

Many current DSLRs provide a solution. They will let you switch the histogram display on your camera to show the average histogram and/or three additional curves for the three separate color channels. (I often work in “live view” mode on my Canon 5D2, where I can choose between seeing the single white average luminosity or the three separate color channels – I leave the display on the latter option by default.) By working with this display you can now see the luminosity levels of the individual channels and spot the hot channel and adjust your exposure accordingly.

What if you have an older DSLR or a camera without this histogram display option? The basic idea remains the same, though you’ll perhaps have to “wing it” a bit. If you do shoot in an automatic exposure mode, you may want to dial in 2/3 of a stop or so of exposure compensation to darken the image a bit. If you can’t get it perfect, in general it may be better to dial in the full stop and be more sure that you’ll avoid the blown red channel.

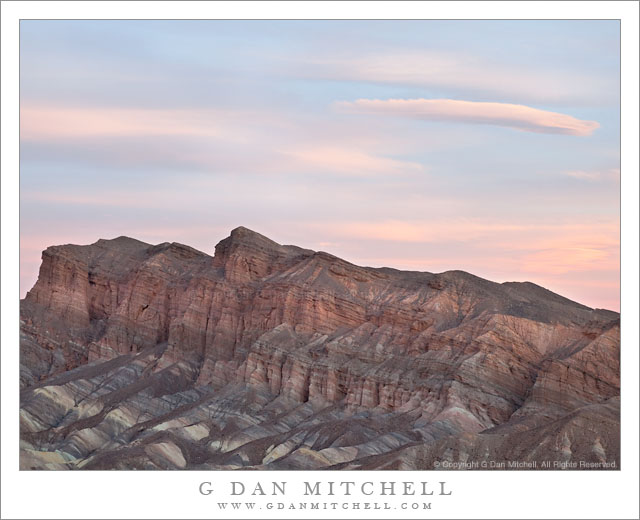
A few final points: First, depending upon what else is in the frame, you may have to do some post-processing to get things to look the way your remember – it may involve some work with curves adjustments, perhaps some color adjustments, and possibly a bit of desaturation. Secondly, you can encounter a similar issue with some types of extremely colorful autumn foliage, especially when it is very “hot” in the orange or red tones, and the same technique can be useful here, too. Third, foliage is not the only cause of this issue – you can also encounter it which intensely colored light from other sources. For example, a common problem is seen in photographs of sunsets on mountain peaks where the intense sunset color blows out the red channel in areas that include the direct sunset light – and, again, “under exposing” a bit can compensate. Fourth, the problem is not limited to the “natural” world either – you can also encounter it when shooting scenes with very colorful artificial light.

G Dan Mitchell Photography | Flickr | Twitter | FacebookLinkedIn | Email
Text, photographs, and other media are © Copyright G Dan Mitchell (or others when indicated) and are not in the public domain and may not be used on websites, blogs, or in other media without advance permission from G Dan Mitchell.

Trail Canyon, Lower Slopes of Wildrose Peak, Death Valley

Trail Canyon, Lower Slopes of Wildrose Peak, Death Valley

Trail Canyon, Lower Slopes of Wildrose Peak. Death Valley National Park, California. March 30, 2011. © Copyright G Dan Mitchell – all rights reserved.

Afternoon shadows fall across the lower slopes of Wildrose Peak above Trail Canyon and below Aguereberry Point, with Death Valley and the Black Mountains beyond.

The view from Aguereberry Point (and from this location close to the point) is spectacular and expansive, taking in everything from Death Valley itself, stretching almost 180 degrees from left to right, to the Green, Black, and other mountains beyond. To the south and north other ranges merge with the atmospheric haze. The peaks of the Panamint range lie behind, and in places where the view is clear you can look down on the rugged terrain of the east face of the Panamint Range with its rugged ridges and deep canyons dropping towards the Valley. This photograph looks roughly southeast towards the lower end of Death Valley in the area around Ashford Mill. The deep foreground canyon, the bottom of which is just visible at lower right, is Trail Canyon. I understand that a four-wheel-drive road used to come up to Aguereberry Point via that canyon, but that parts have washed out and it can no longer be driven. I think that you can hike it, but that would be one heck of a climb since the base of the canyon can’t be more than a few hundred feet above Death Valley (which is below sea level in this area) and the Point is well above 6000′. The lower slopes of Wildrose Peak rise beyond the canyon.

Surprisingly, this view presents several photographic challenges. Because of the haze that appears when such great distances are part of the scene, I chose to use a polarizing filter for this shot. Timing is important here, too. Arrive a bit too early and the light is harsh and flat. Arrive a bit too late and the foreground ridges are quickly enveloped in shadows as the sun drops behind the crest of the Panamint Range. (Yes, I have made both mistakes in the past.) Knowing this, I arrived a bit earlier than I might have usually arrive to shoot evening light and I managed to photograph the scene before that Panamint Range shadow obliterated the foreground light.

G Dan Mitchell Photography | Flickr | Twitter | Facebook | Email
Text, photographs, and other media are © Copyright G Dan Mitchell (or others when indicated) and are not in the public domain and may not be used on websites, blogs, or in other media without advance permission from G Dan Mitchell.

Telling Stories About Our Photographs

I am as guilty as (OK, more guilty than) anyone else when it comes to writing a lot of words about my photographs! This is ironic in a way, since I believe that, for the most part, successful photographs should be able to say whatever they have to say without a lot of verbal explanation or justification. (There are clearly exceptions to this “rule,” and this is not to say that there isn’t a lot to talk about in photographs.) But some people seem to enjoy the descriptions, so I offer a bit of back story about every photograph, and I love to discuss the photos with folks who share my interest.

Recently I read a post about a fine landscape photograph that someone had produced – the photograph was one of those that is good enough to make me think about how I might create such an image. As I write this now, I have forgotten whose post it was and precisely which photograph it was about. But something that struck me about this post was the tremendously compelling and somewhat scary story that the photographer told about getting the photo. It included things like standing for days in tremendously difficult and seemingly dangerous weather conditions, traveling miles and miles across difficult terrain to find precisely the image that he/she had previsualized, and the tremendous good fortune of finding this perfect image after days and days of enduring challenges that normal people would not or perhaps could not endure.

Some such stories may be true. (Though more often I suspect that they are considerably embellished, but what’s wrong with a bit of fun fiction now and then? :-) But sometimes I wonder if the effect of the photograph would be the same without the spine-tingling story-telling? And I wonder to what extent some viewers tend to look at (or not) photographs that are not accompanied by such compelling and daring tales? What is the balance between viewers being intrigued by the apparently adventure-filled lives lived by photographers and viewers reacting to the intrinsic quality of the photographs themselves?

With this in mind, I offer two descriptions of events associated with the creation of photographs. Think about how the stories affect your perception of the images – for better or worse. ;-)

Story #1

It was a tough morning in the arid desert valley. The oppressive early season heat had arrived and it was over 90 degrees shortly after sunrise. Raging wind threatened a dust storm, and I had been suffering in the heat and dust and dryness for many days. However, this remote location being a place of remarkable extremes, the surrounding mountain peaks were topped by several inches of recent snowfall, rendering many areas inaccessible to anyone unprepared for serious alpine travel. So I faced a choice — endure another day in the sun-blasted furnace of the valley or attempt to struggle up into the alpine zones of the towering mountains and make a photograph. Continue reading Telling Stories About Our Photographs